Employee Management System Guide#
The Employee Management module provides HR personnel with a comprehensive interface to manage various aspects of employee records, requests, and organizational policies. This guide details the key functionalities accessible from the Employee Management menu.
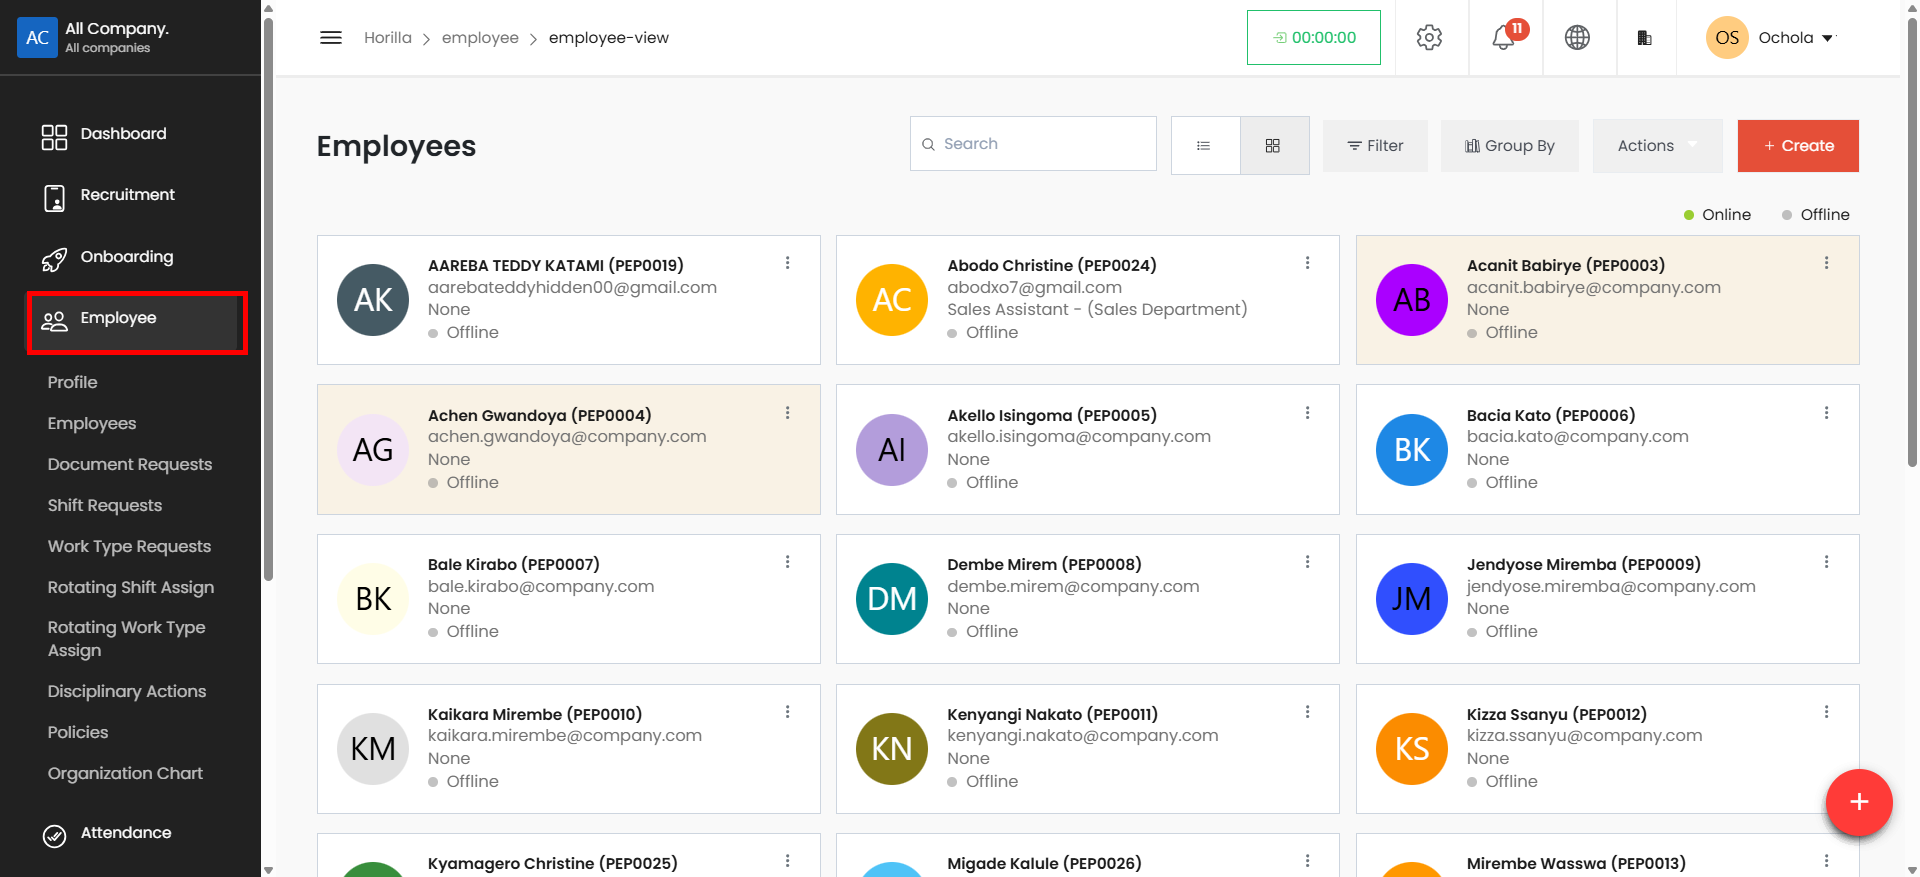
Accessing the Employee Management Menu#
Navigate to the Employee module from the main menu.
The left sidebar will display various sub-sections related to employee management.
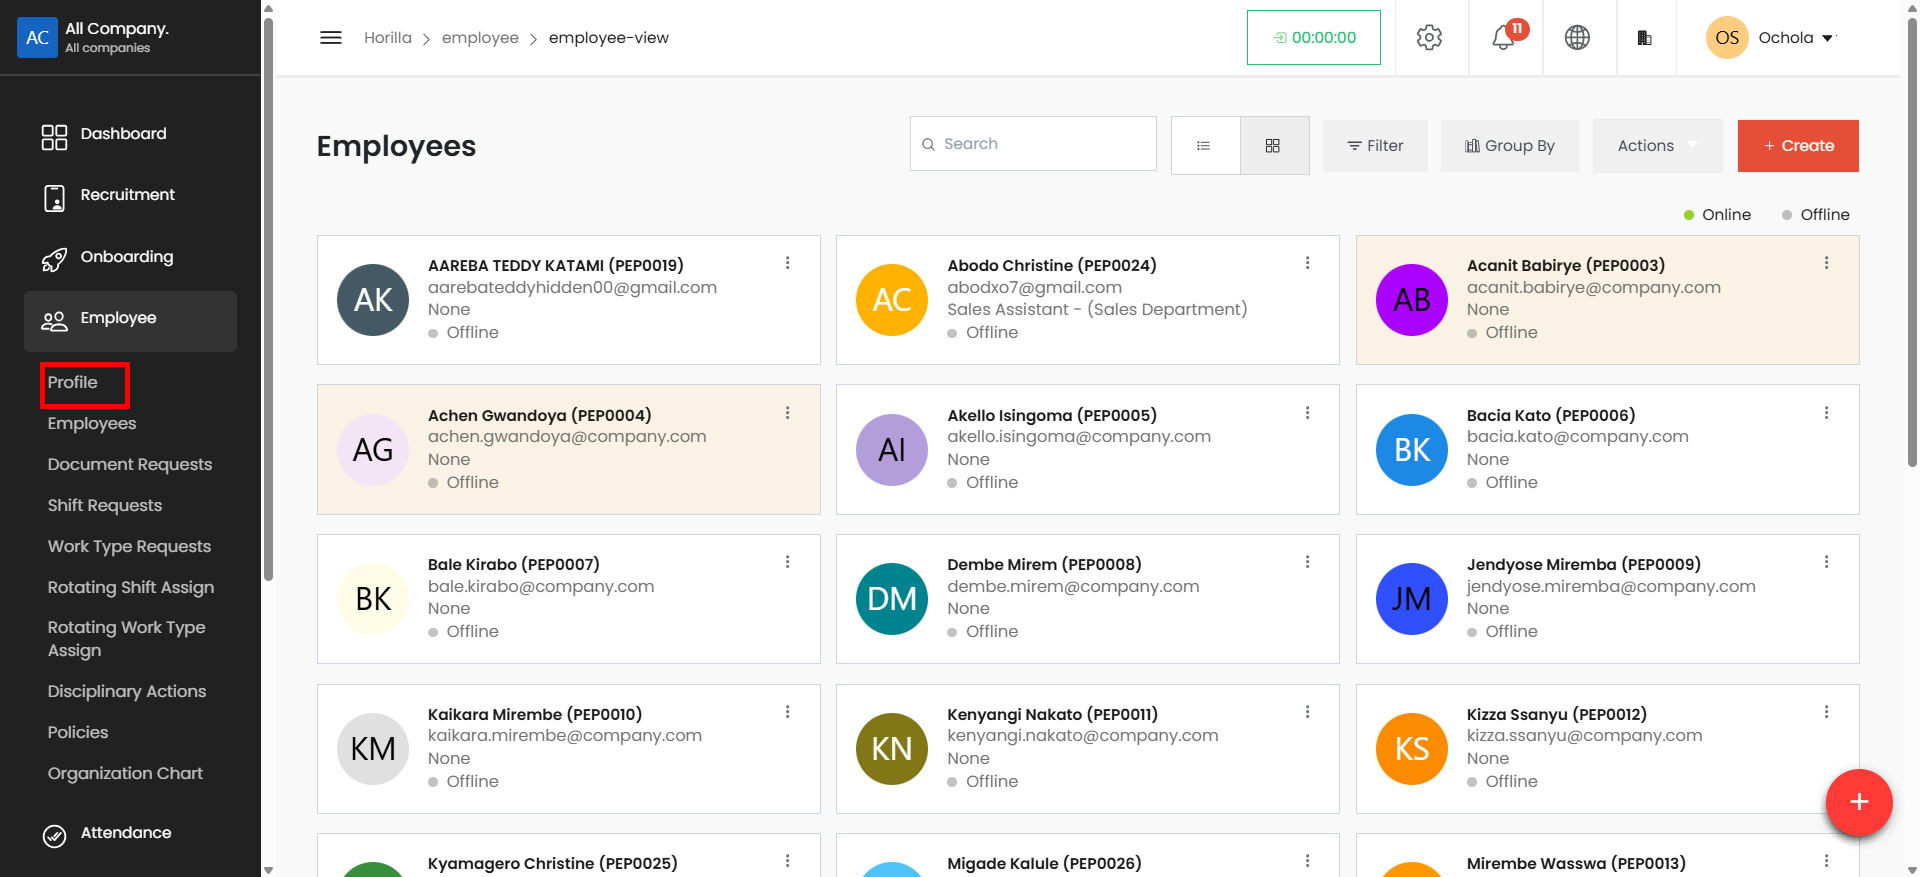
Employee Profile#
Allows users to view employee details such as personal information, job designation, department, and contact details.
Users can navigate between different sections to access work-related information, including salary details, performance records, and assigned projects.
Authorized users can edit and update information, ensuring accurate and up-to-date records.
Employees#
Displays a list of all employees within the organization with options to search and filter by name, department, or employment status.
Allows HR personnel to add new employees by filling out a detailed form with required information.
To add a new employee;
Click the Create buttton
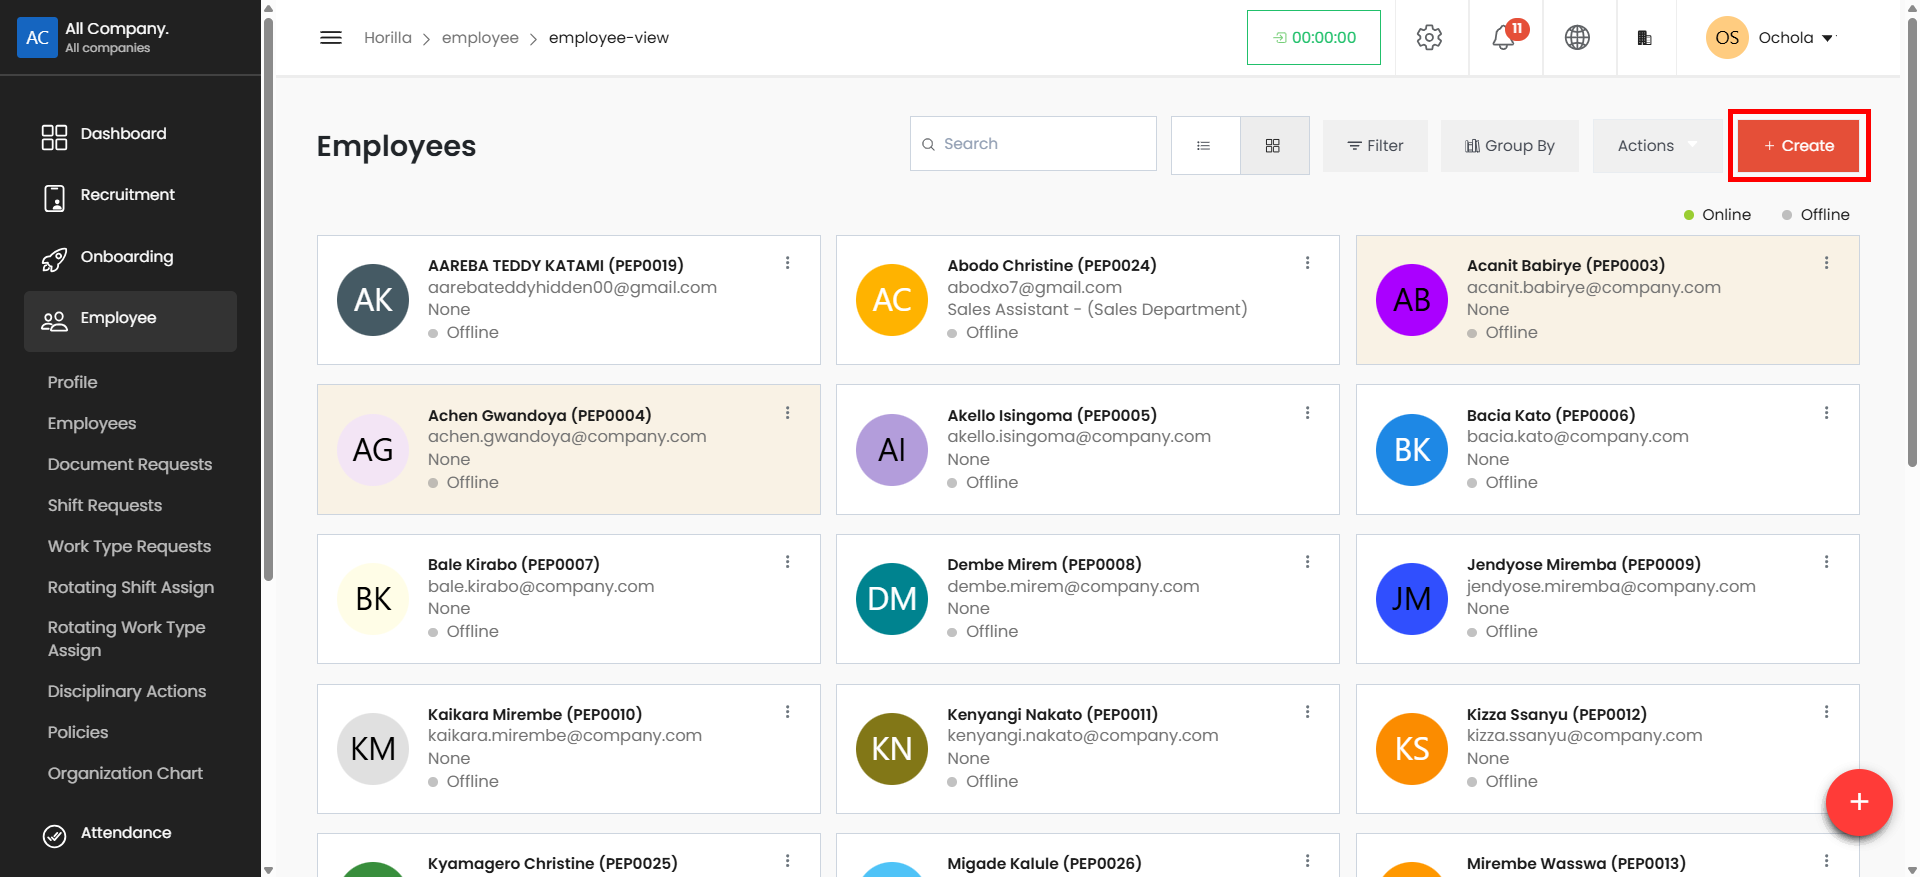
A form is displayed with the fields to provide
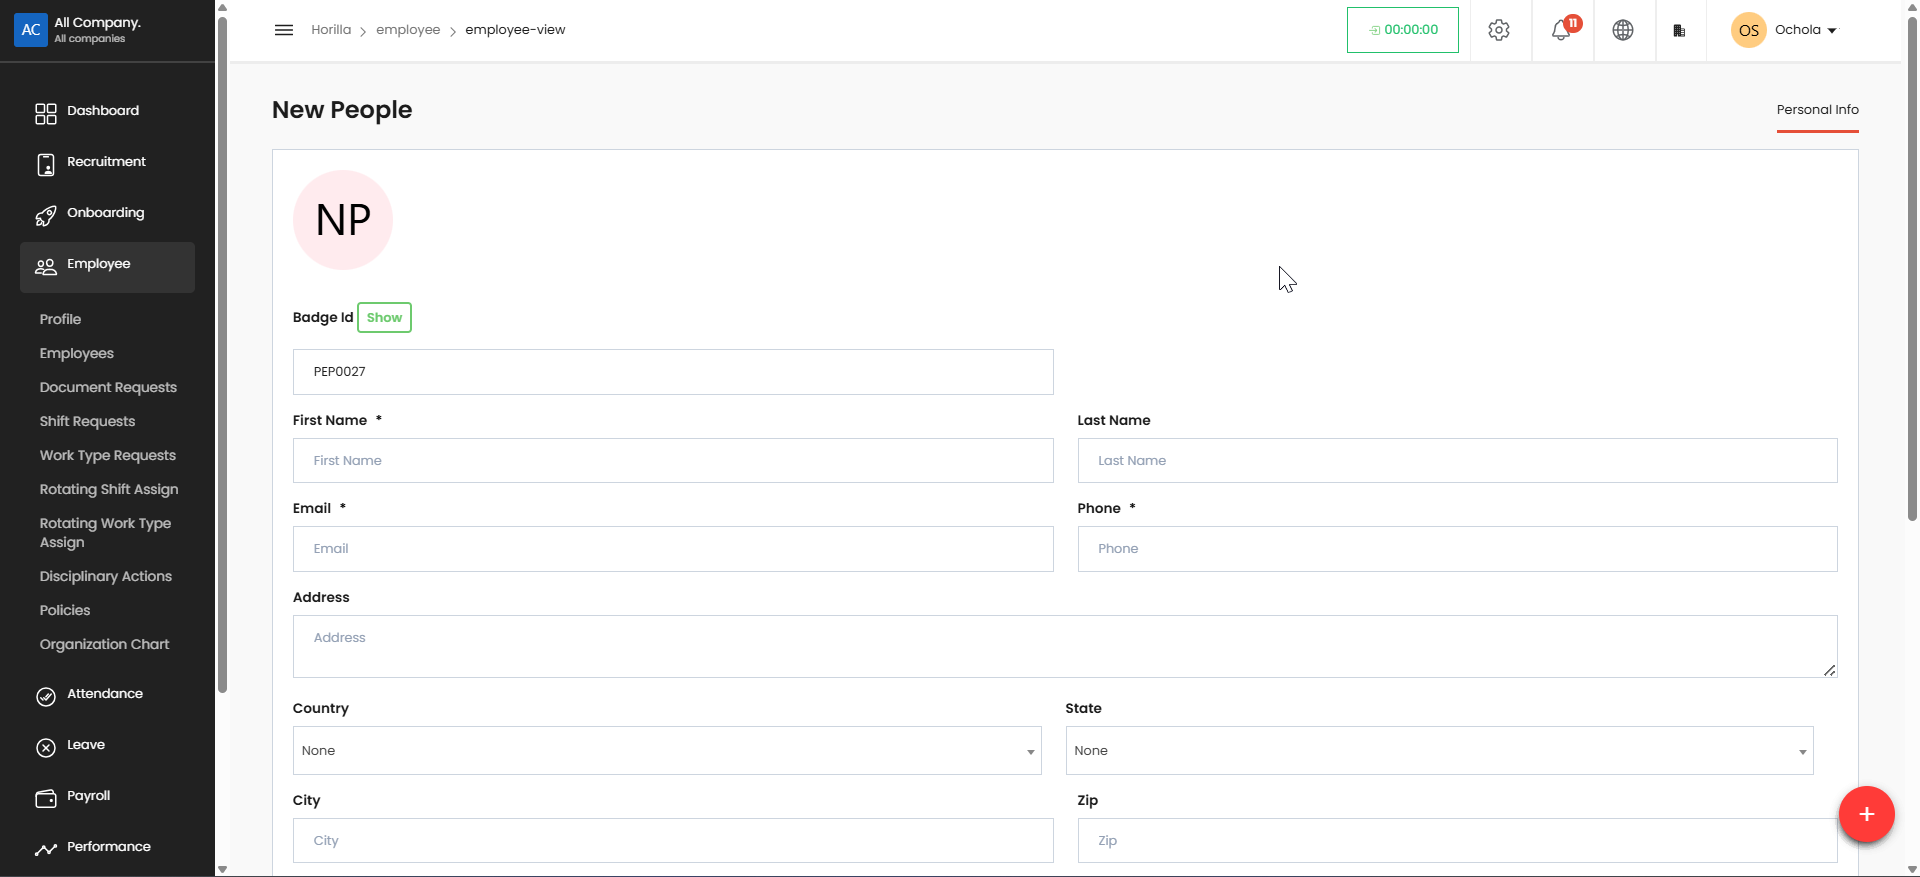
Once done, click the Save button at the bottom of the form
Alternatively, employees can be imported using an excel provided by the system as below;
Employee Importation Process#
Steps to Import Employees:
Click on the Actions tab.
Select Import from the dropdown menu.

A confirmation prompt appears asking if you want to download the template.
Click Confirm to download the Excel template.
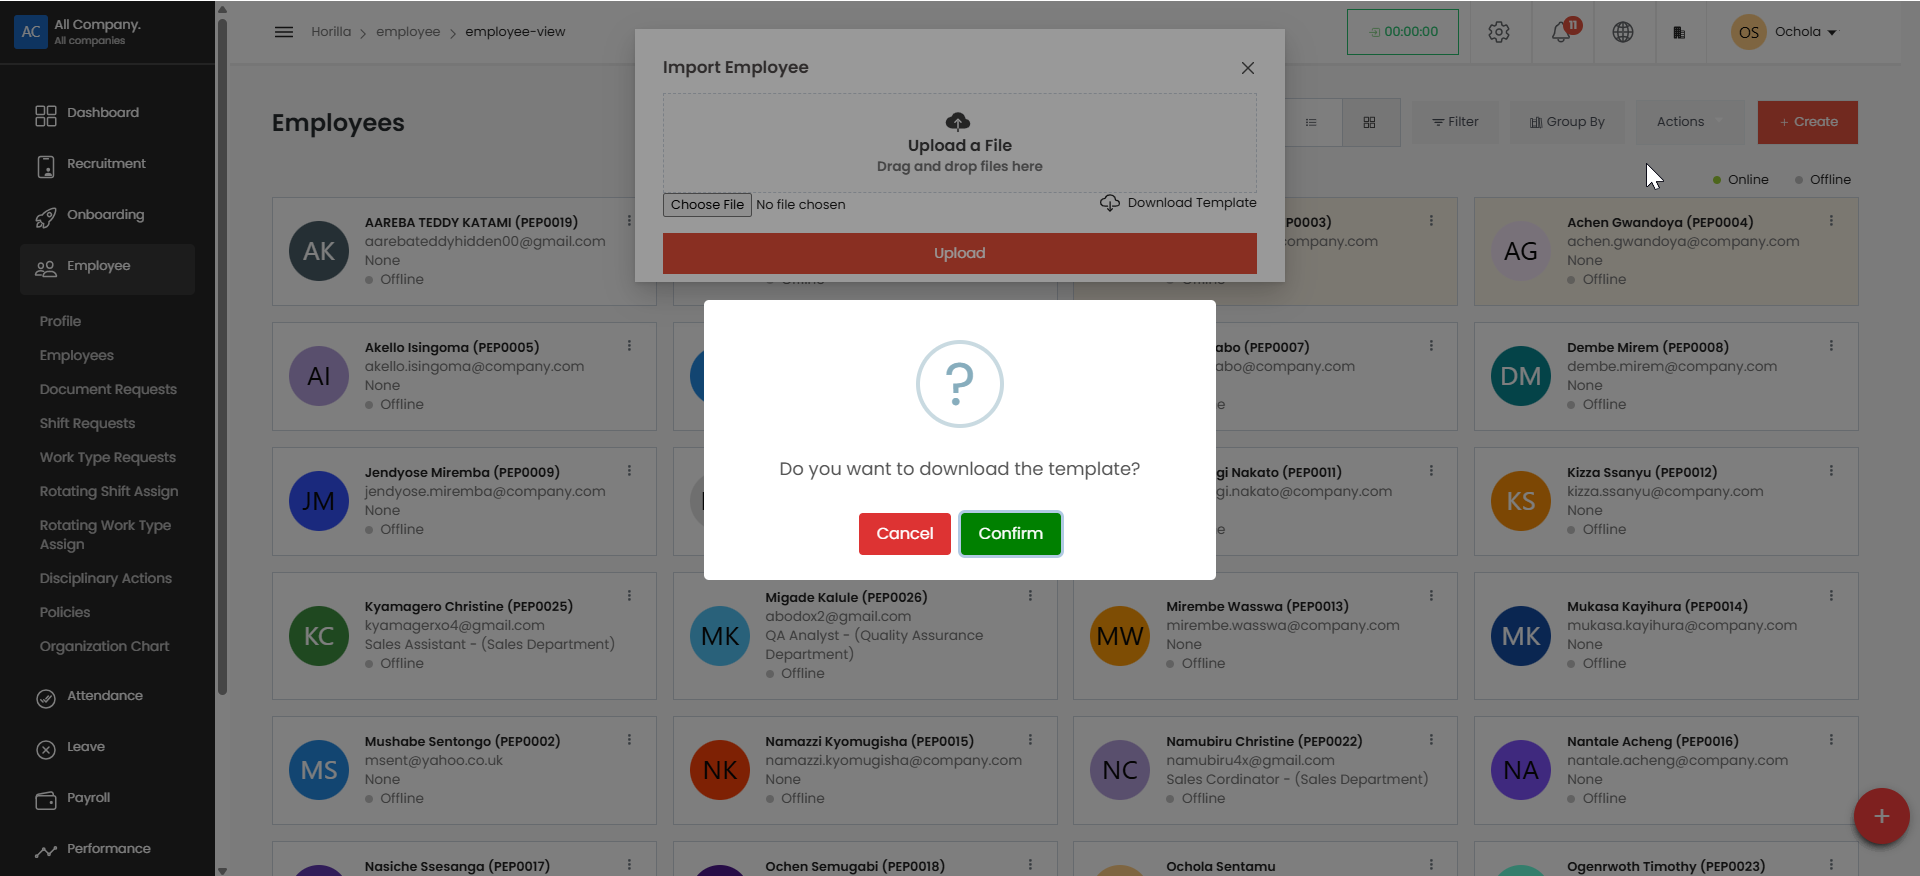
Fill in the employee details in the downloaded template.
Re-upload the completed template using the Upload function.
The system validates the data and saves it to the employees.
You can then find the imported employees on the employees page.
Document Requests#
Employees can request and upload required documents such as academic certificates, identification documents, and employment verification letters.
Creating a Document Request#
To request a document, follow these steps:
Navigate to the Document Requests module from the main dashboard.
Click on the Create button.
Fill in the required details as seen in the image below.
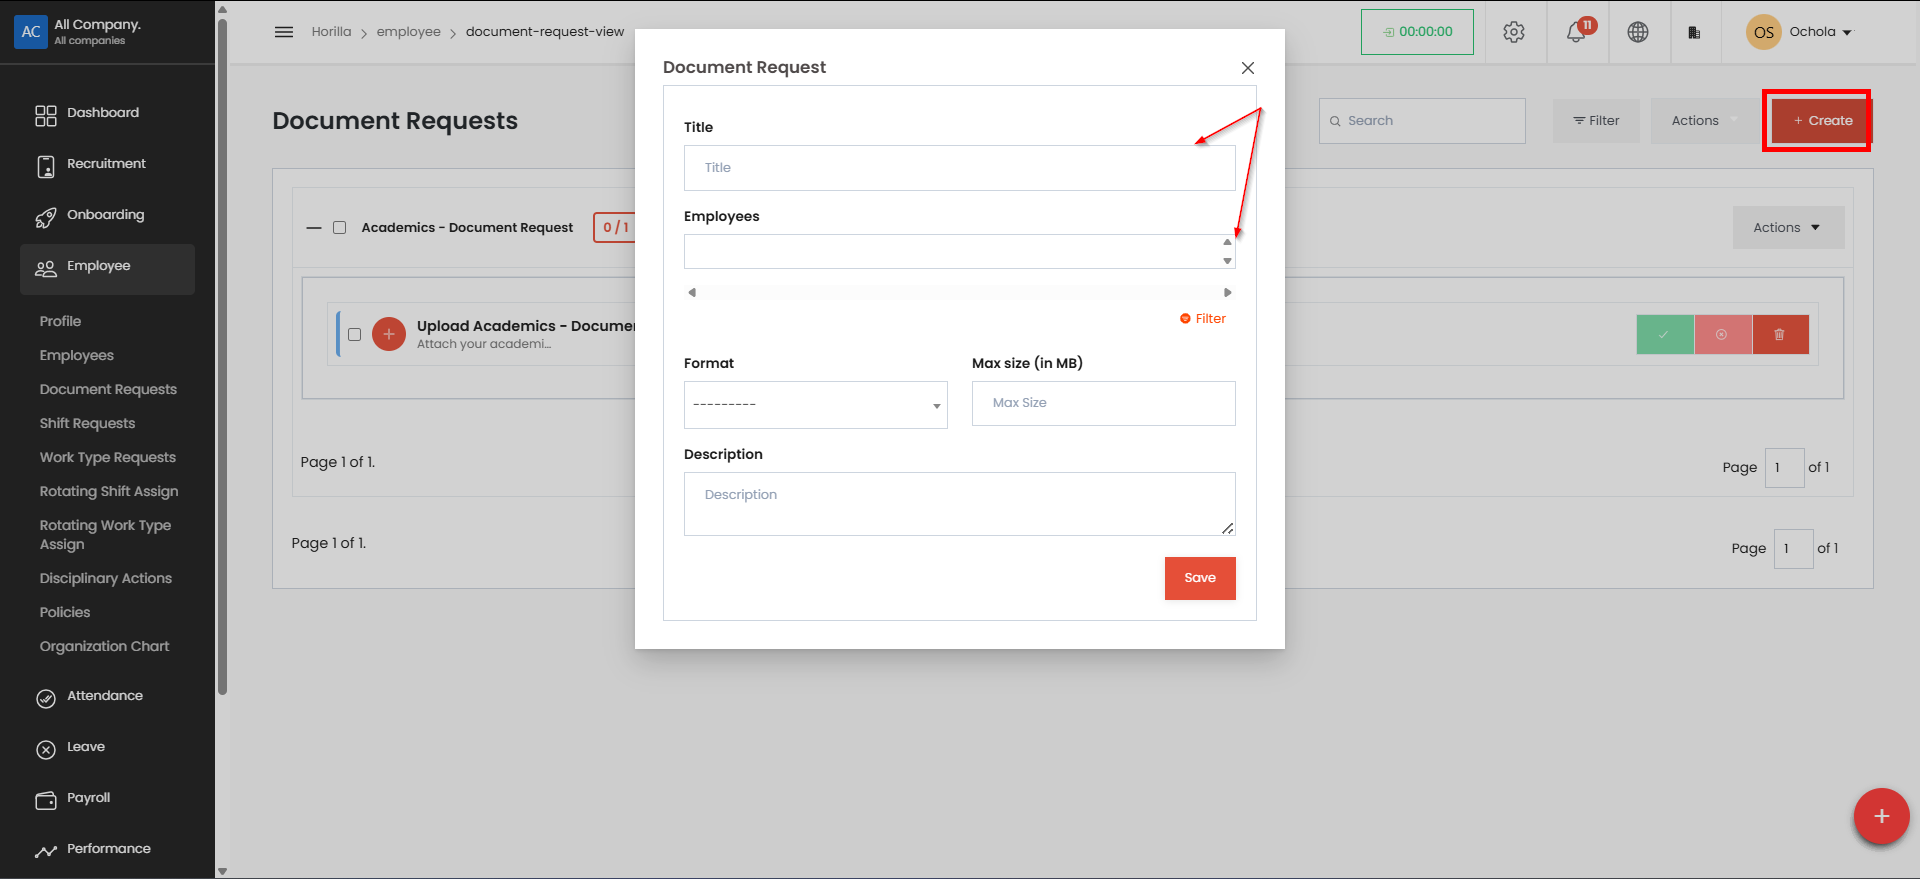
Click Save to submit the request.
Managing Document Requests#
Once a document request has been submitted, HR or authorized personnel can manage it as follows:
Review Requests: Access the list of submitted document requests.
Approve or Decline Requests: Approve or decline a request based on validity and necessity.
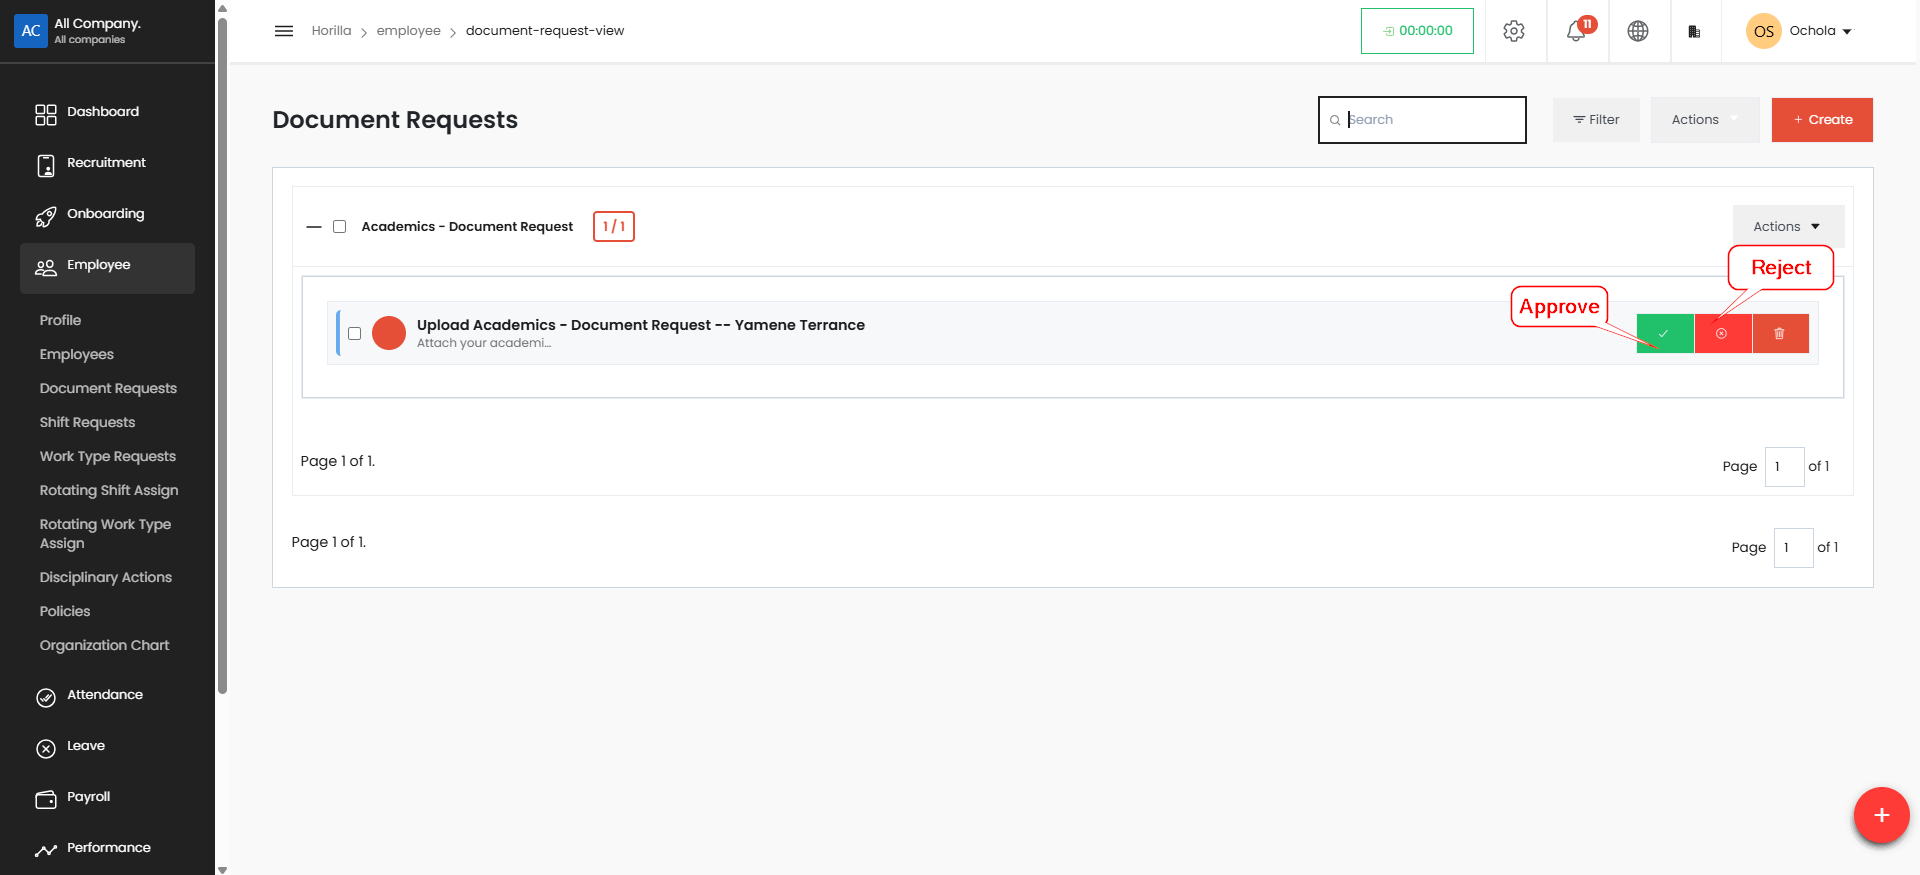
Attach Required Files: Upload any necessary supporting documents before processing the request.
Track Request Status: Monitor the status of all document requests in real time.
Shift Requests#
Employees can submit requests to change their work shifts based on personal or professional needs.
HR personnel or managers can review, approve, or decline requests according to company policies.
Shift history and approvals are recorded for future reference, ensuring smooth workforce management.
Creating a New Shift Request
Click the + Create button in the top-right corner of the Shift Requests page
Complete the following fields in the dialog box:
Employee: Your name (auto-filled in most cases)
Requesting Shift: Select the shift type you want to work
Requested Date: Enter the date you want the shift to begin
Requested Till: Enter the end date (if applicable)
Description: Provide details about your request (required)
Permanent Request: Toggle this option if this is an ongoing request
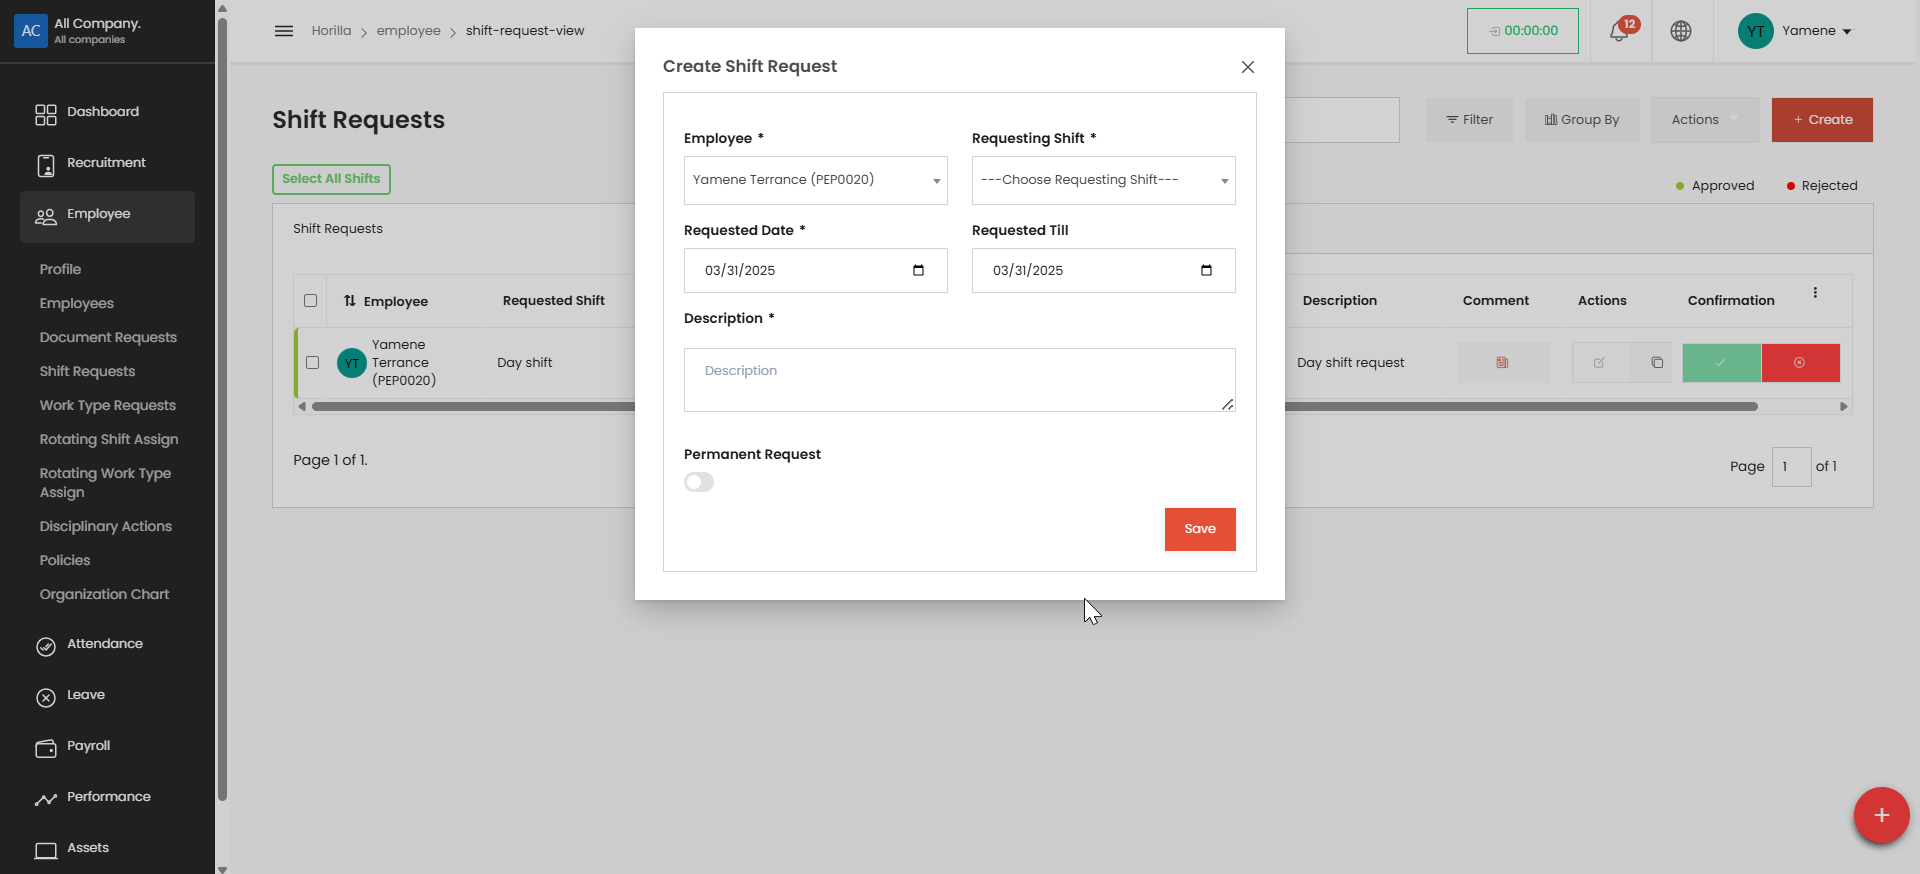
Click "Save" to submit your request
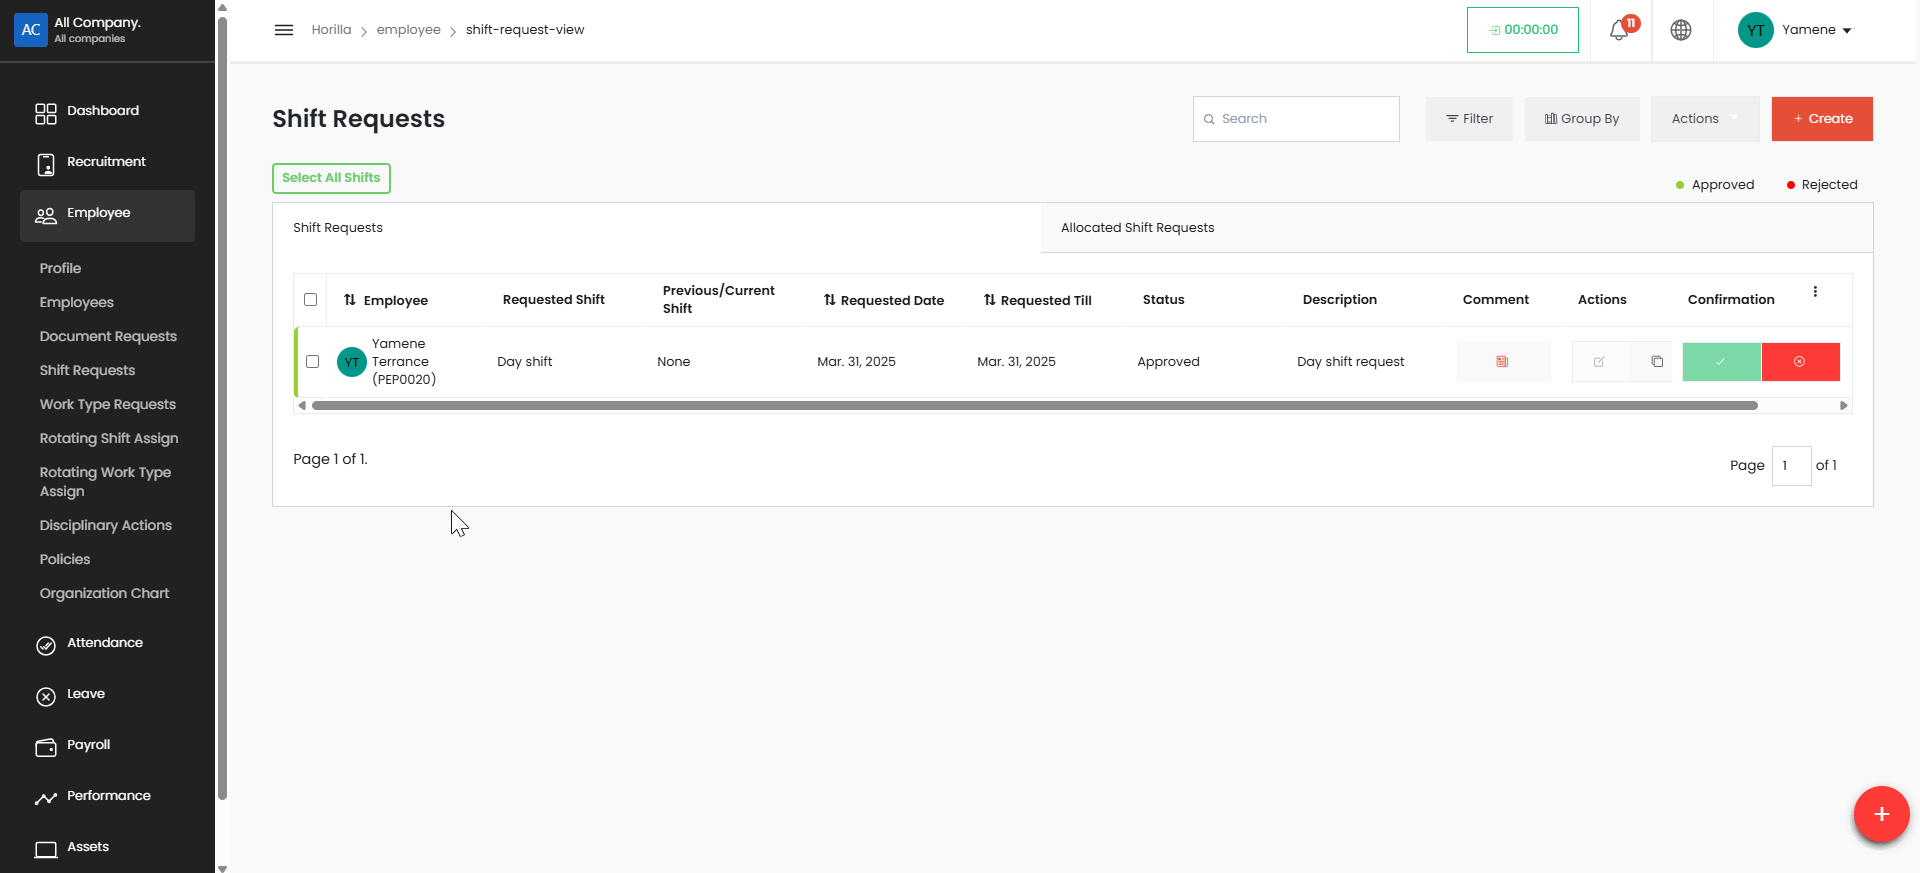
Viewing Your Shift Requests#
The main Shift Requests screen displays all your submitted requests with their current status (Pending, Approved, or Rejected).
For Managers#
Managing Shift Requests#
Review all employee shift requests in the main dashboard Use the Filter and Group By options to organize requests as needed
For each request, you can:#
View the employee name and requested shift details
Read the description provided by the employee
Add comments for internal notes or feedback to the employee
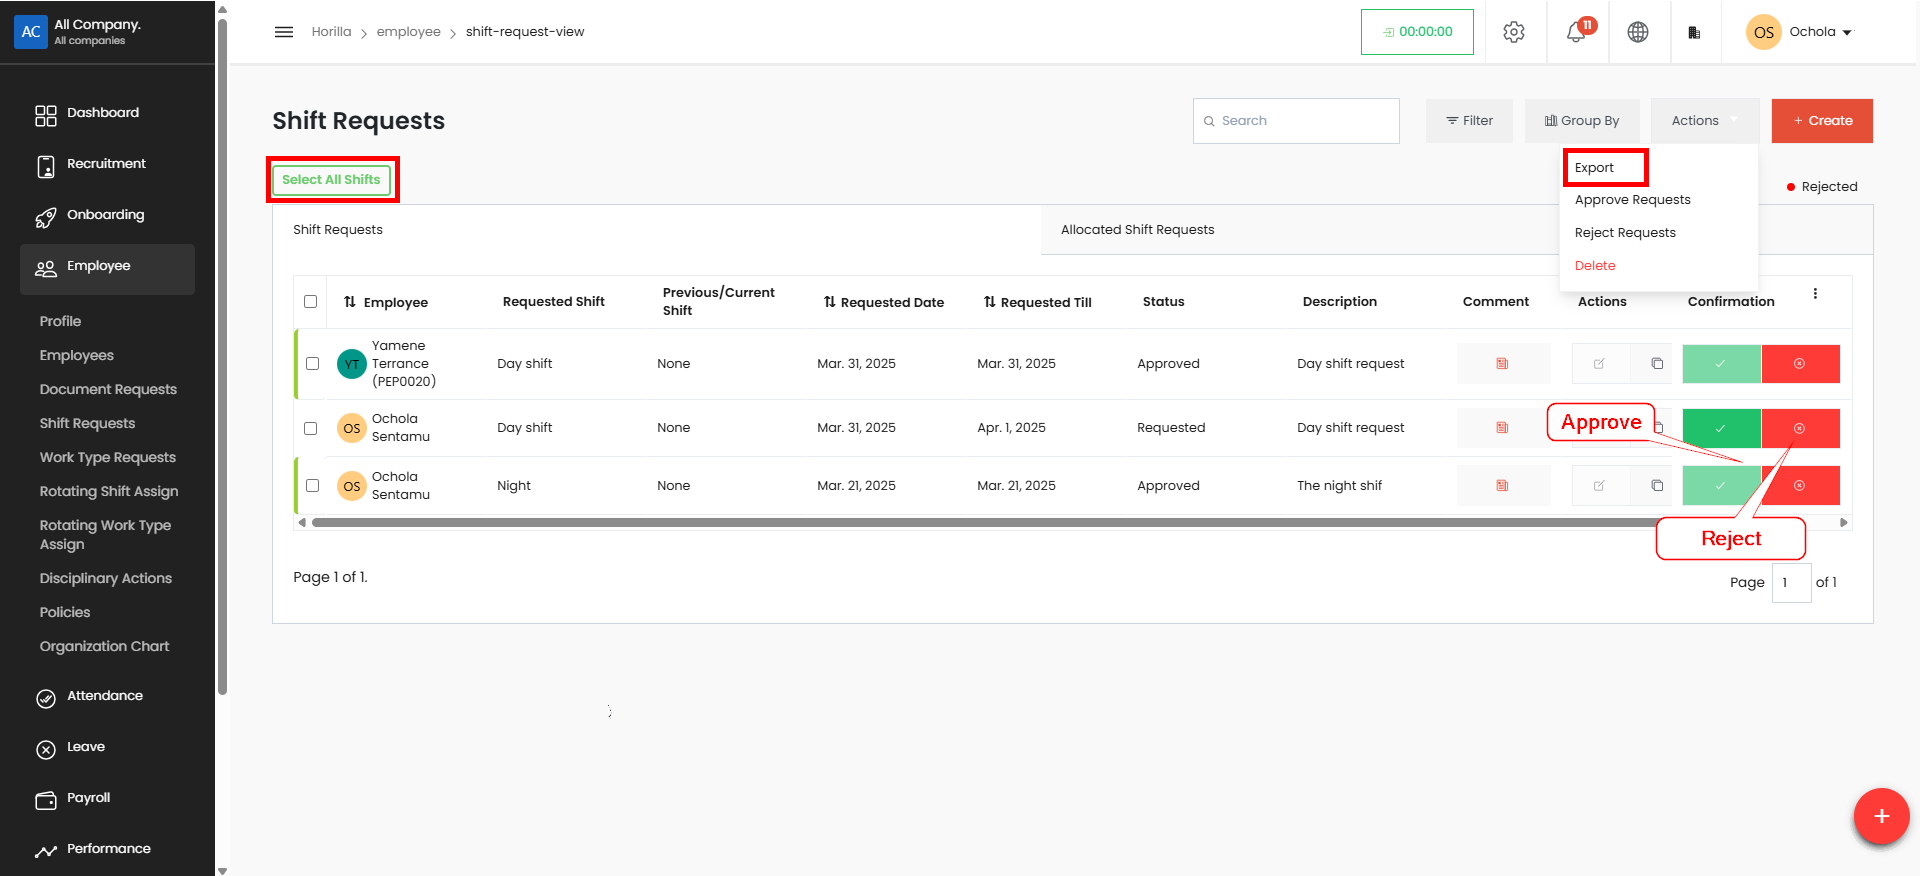
Approving or Rejecting Requests#
Review each shift request thoroughly To approve a request: Click the green approval button To reject a request: Click the red rejection button Optional: Add a comment explaining your decision
Additional Management Features#
Use the Select All Shifts button to perform bulk actions Check the Confirmation column to verify request status Use the Actions menu for additional options
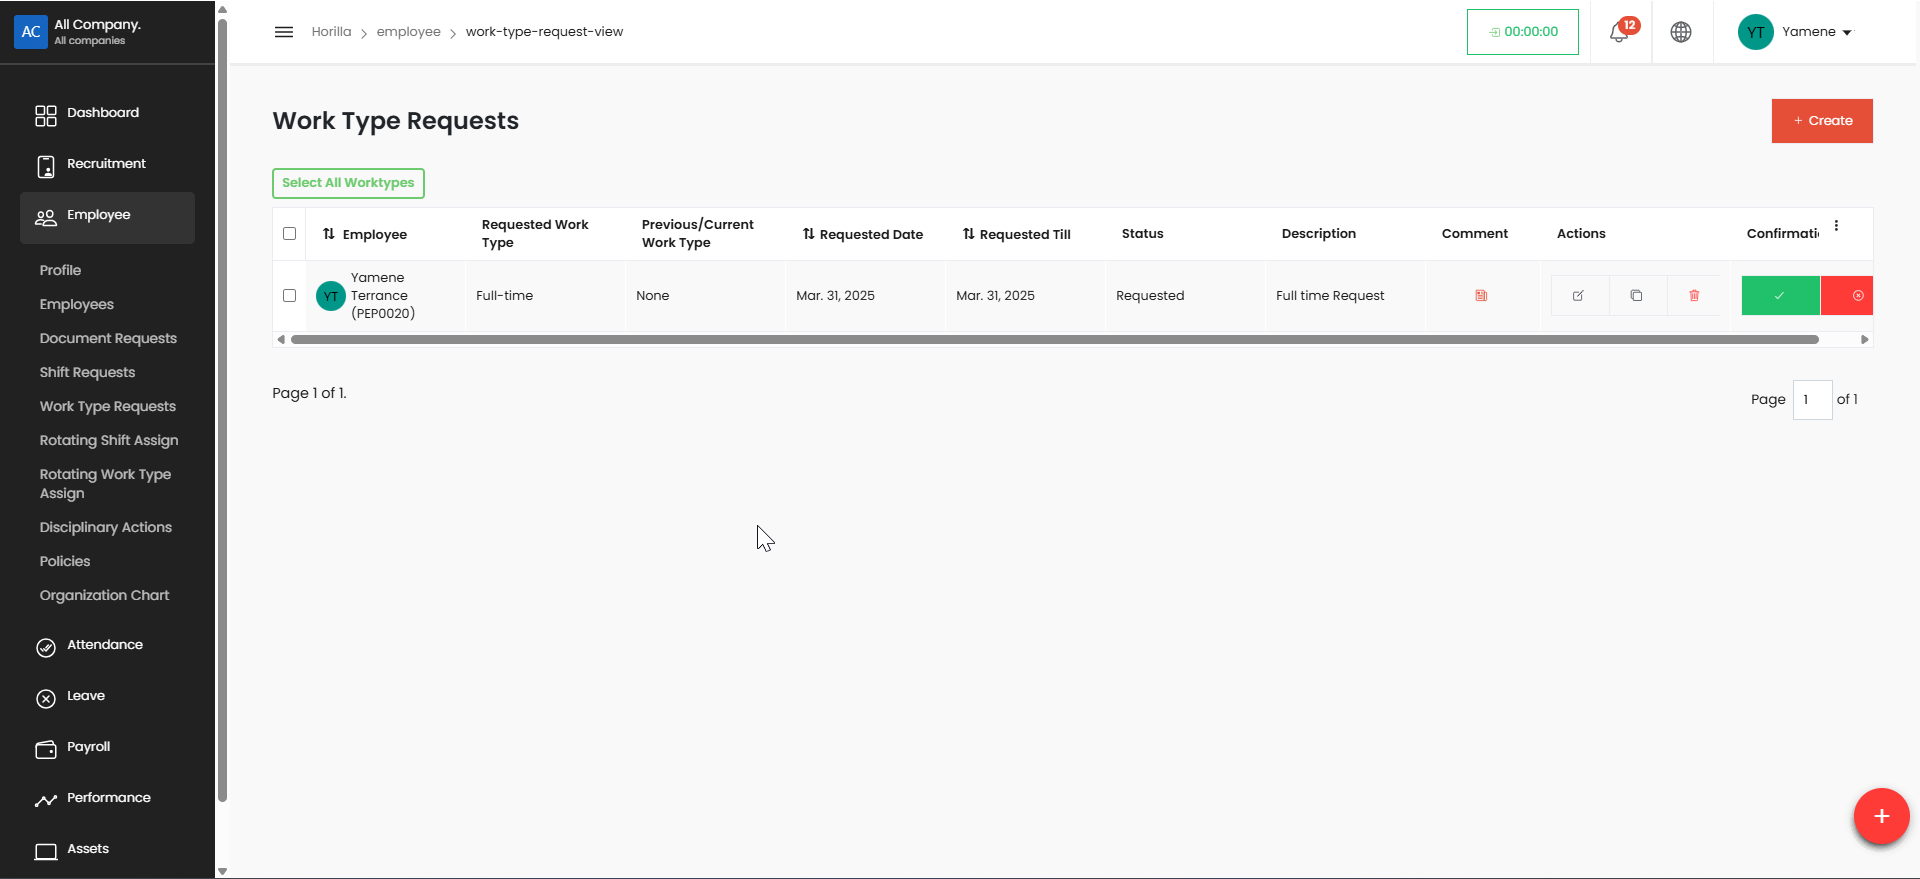
Work Type Requests#
Employees can request changes in their work type (e.g., Full time, Part time, hybrid).
Creating a Work Type Request#
Navigate to Employee > Work Type Requests in the left sidebar
Click the "+ Create" button in the top-right corner
Fill in the required fields:
Employee: Select employee name
Requesting Work Type: Choose from dropdown
Requested Date: Enter start date
Requested Till: Enter end date (optional)
Description: Add details about your request
Toggle Permanent Request if this is an ongoing request
Click Save to submit
Managing Work Type Requests#
View all requests on the main Work Type Requests page Use "Select All Worktypes" for bulk actions
Review request details including type (e.g., Full-time)
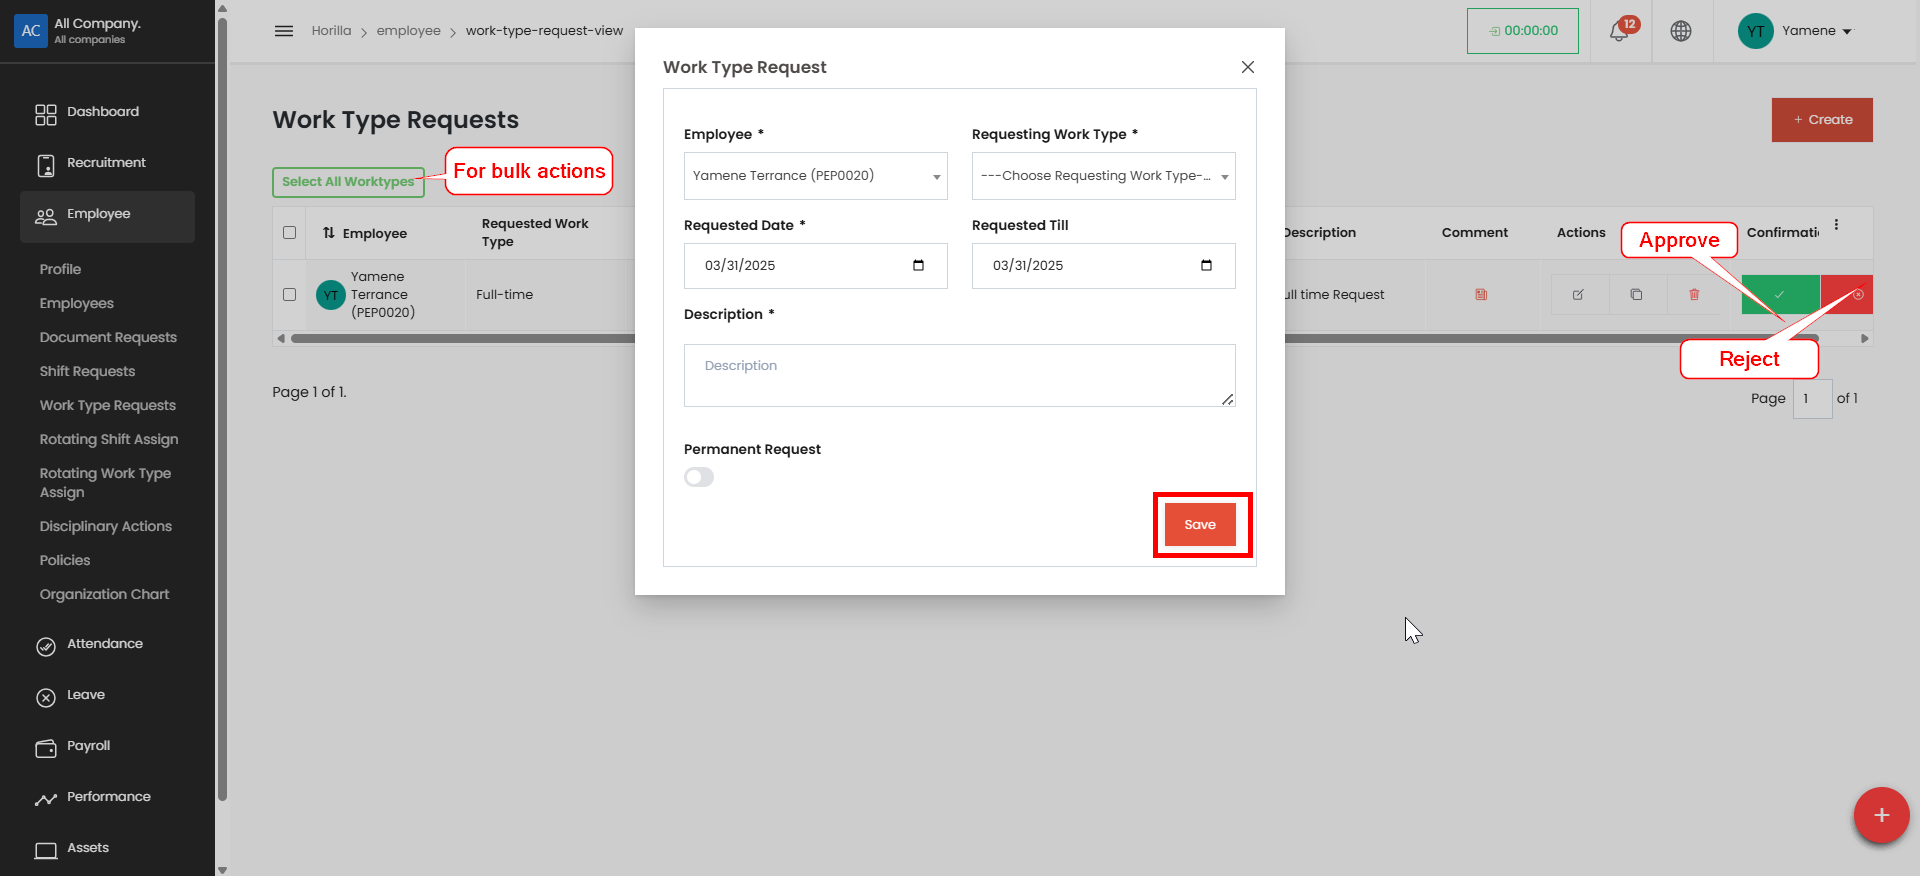
Approve: Click the green checkmark Reject: Click the red X
Add comments as needed in the Comment section
Rotating Shift Assignment#
HR personnel can assign rotating shifts to employees to ensure balanced workload distribution.
Creating a Rotating Shift Assignment#
Navigate to Employee > Rotating Shift Assign in the left sidebar
Click the "Assign" button in the top-right corner
Complete the form with required information:
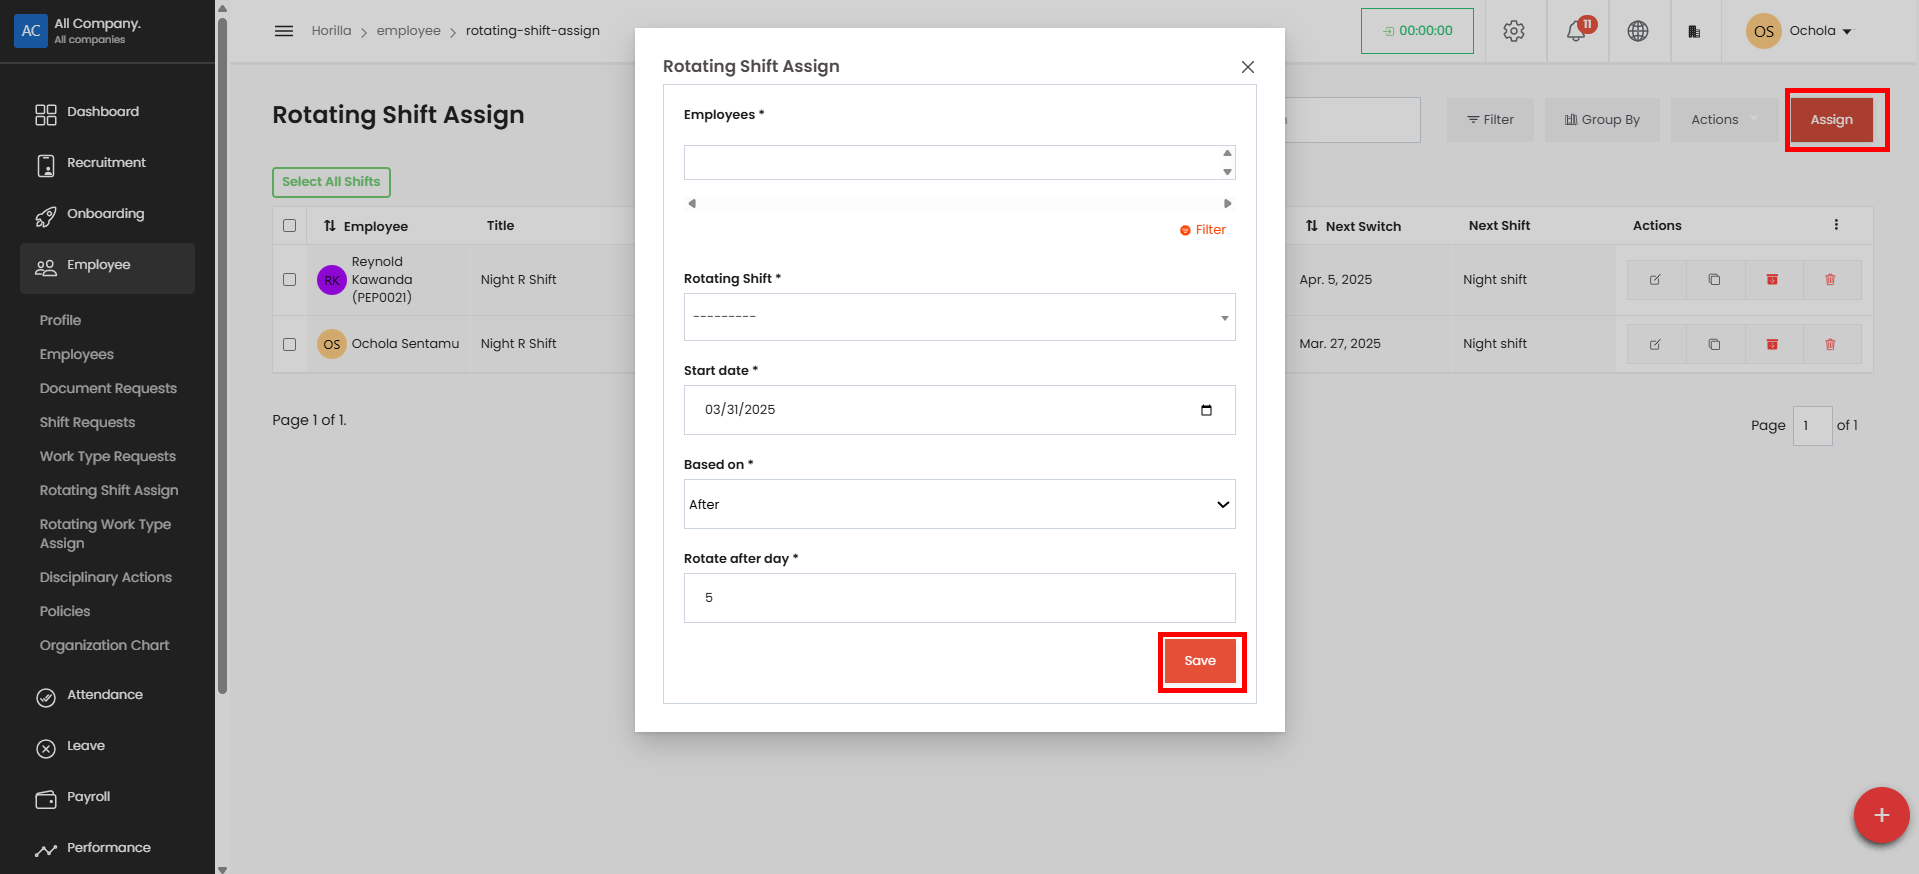
Employees: Select employees from the dropdown Rotating Shift: Choose the shift type Start date: Set the starting date for rotation Based on: Select "After" or other option from dropdown Rotate after day: Enter number of days (e.g., 5)
Click "Save" to create the assignment
Managing Rotating Shifts#
View all rotating shift assignments on the main page
Use "Select All Shifts" for bulk actions
Monitor employee schedules with "Next Switch" and "Next Shift" columns
Edit assignments using the edit icon
Delete assignments using the trash icon
Use Filter and Group By options to organize the view
Rotating Work Type Assignment#
Allows HR personnel to assign employees to different work types on a rotational basis.
Creating a Rotating Shift Assignment#
Navigate to Employee > Rotating Shift Assign in the left sidebar
Click the "Assign" button in the top-right corner
Complete the form with required information:
Employees: Select employees from the dropdown
Rotating Shift: Choose the shift type
Start date: Set the starting date for rotation
Based on: Select "After" or other option from dropdown
Rotate after day: Enter number of days (e.g., 5)
Click "Save" to create the assignment
Managing Rotating Shifts#
View all rotating shift assignments on the main page

Use "Select All Shifts" for bulk actions
Monitor employee schedules with "Next Switch" and "Next Shift" columns
Edit assignments using the edit icon
Delete assignments using the trash icon
Use Filter and Group By options to organize the view
Disciplinary Actions#
Provides a record of any disciplinary actions taken against employees, such as warnings, suspensions, or dismissals.
Disciplinary Action Creation Process#
To create a disciplinary action in the HR management system:
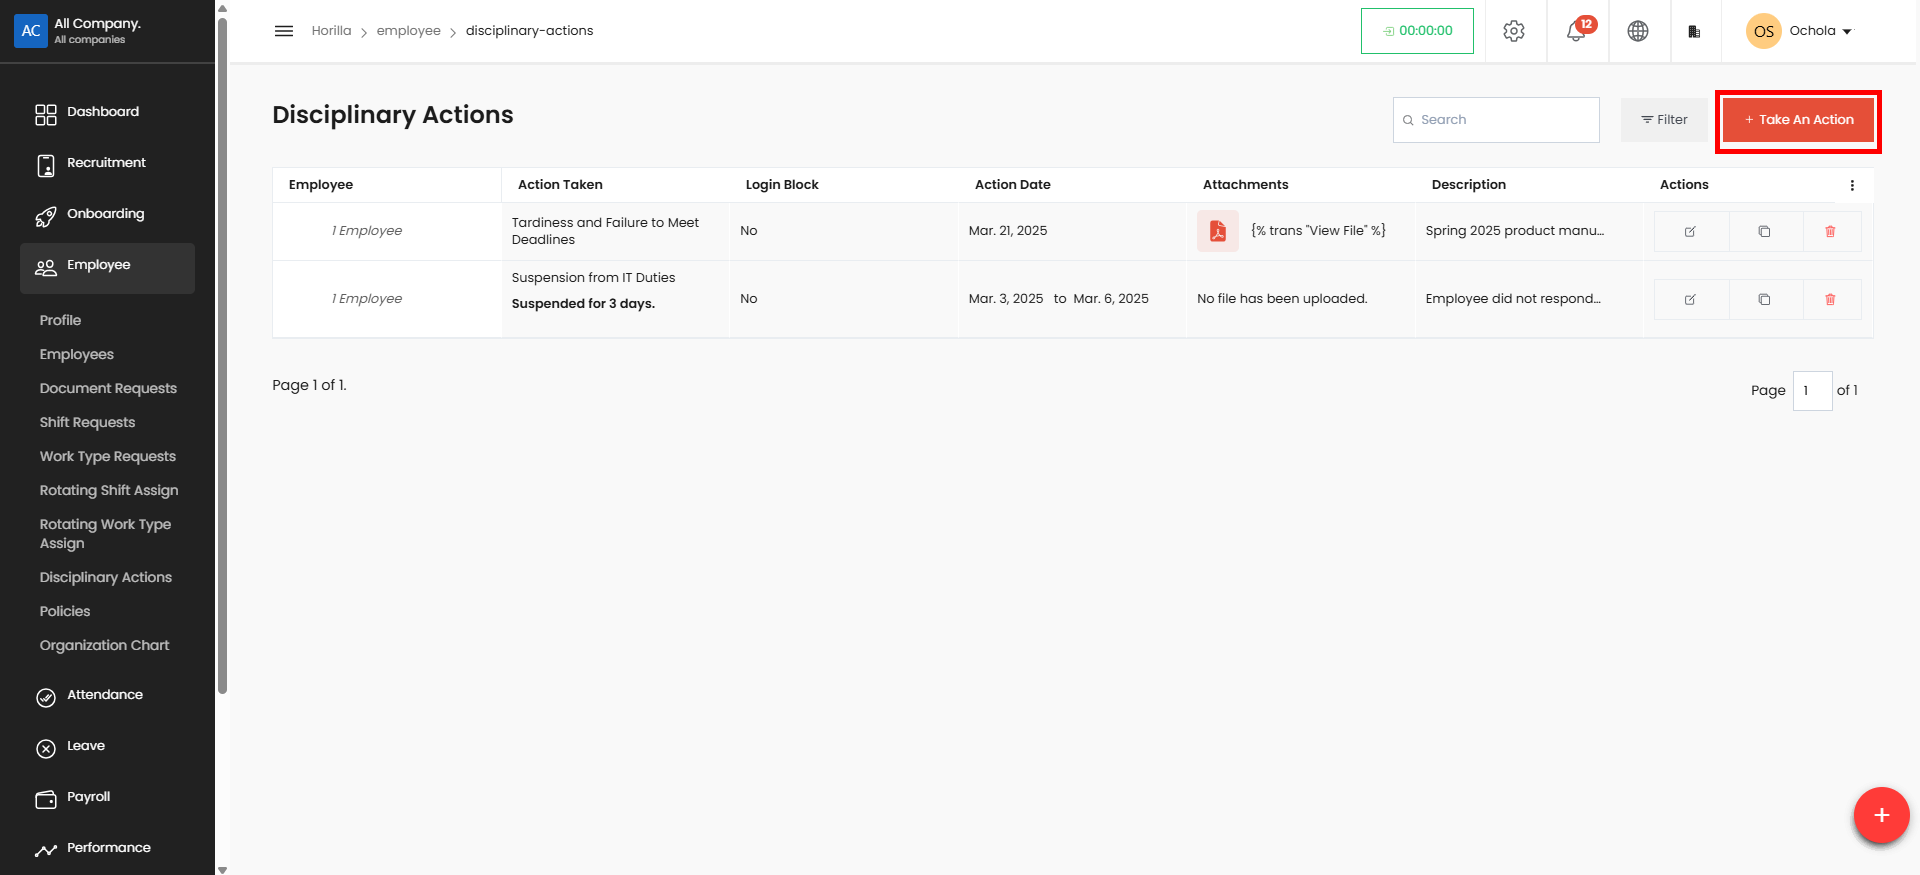
Navigate to the Disciplinary Actions section from the left sidebar menu.
Click the + Take An Action button located in the top-right corner of the screen.
In the "Take An Action" modal window that appears, complete the following required fields:
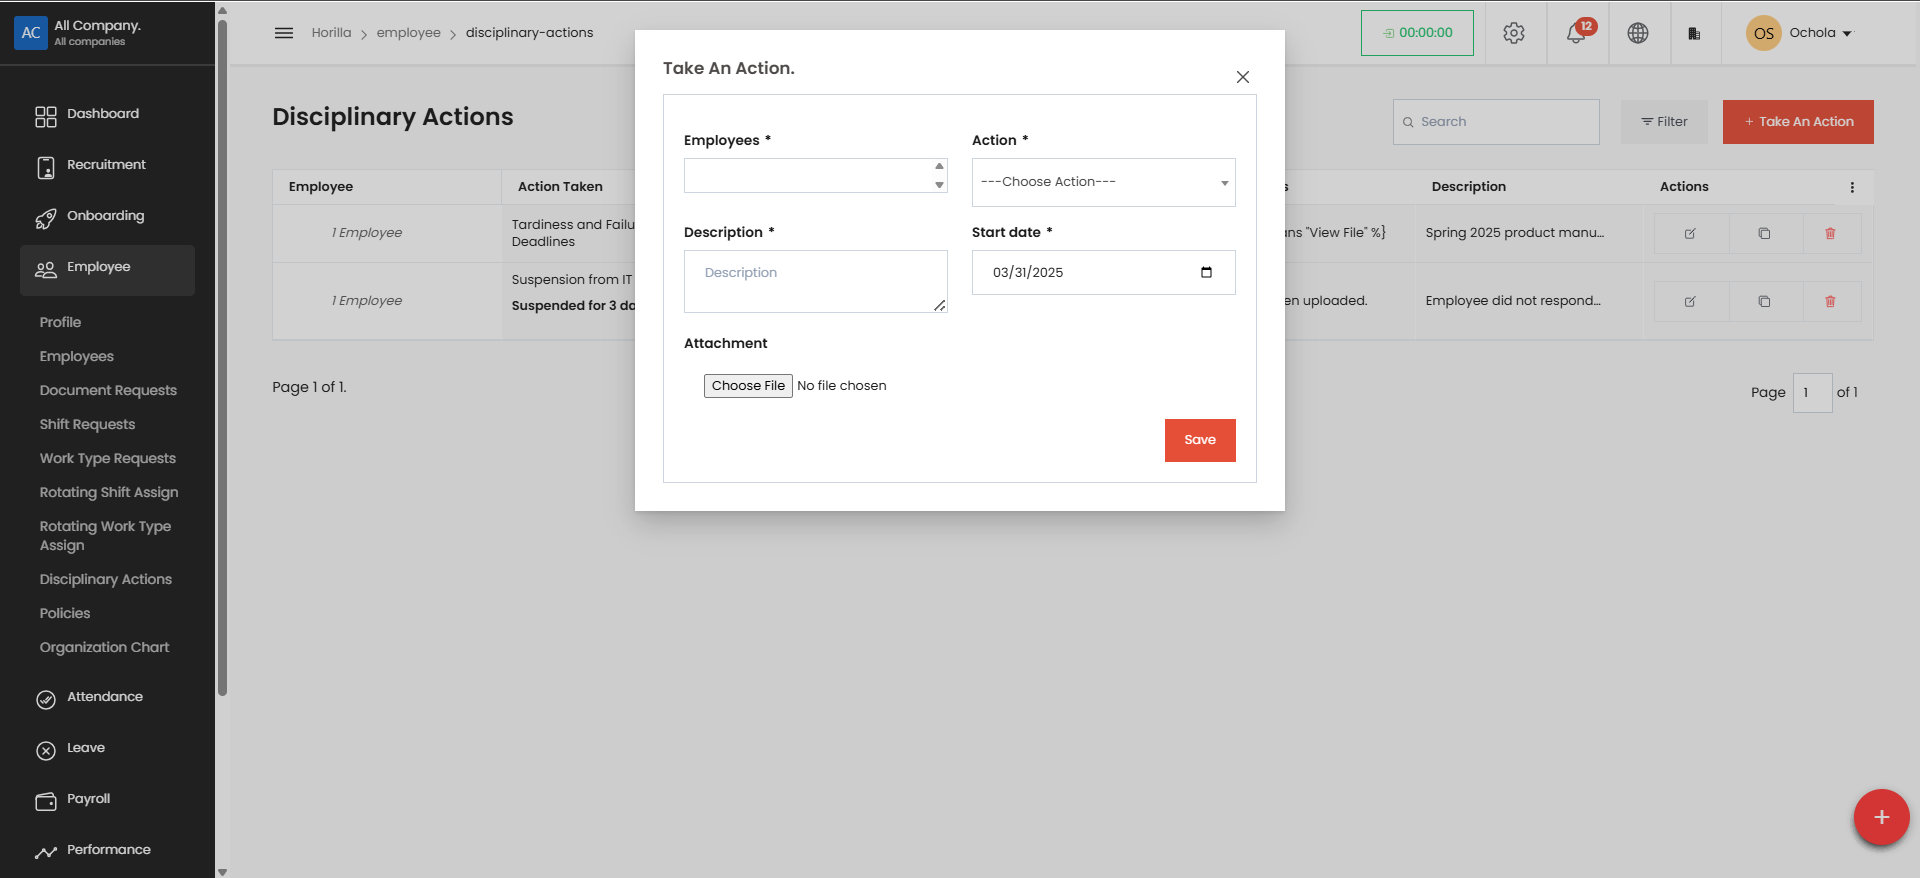
Employees: Select the employee(s) from the dropdown menu
Action: Choose the appropriate disciplinary action type from the dropdown (e.g., Warning, Suspension)
Description: Enter details about the incident, including specific behaviors, dates, and any previous discussions
Start date: Select the date when the disciplinary action becomes effective
Optional: Add supporting documentation by clicking the "Choose File" button in the Attachment section.
Review all information for accuracy and completeness.
Click the "Save" button to submit and record the disciplinary action.
Once saved, the new disciplinary action will appear in the Disciplinary Actions table, showing the employee name, action taken, description, and available action options.
Policies#
Displays company policies regarding employment, leave management, workplace conduct, and other regulations.
Policy Creation Process#
To create a policy:
Navigate to the Policies section from the left sidebar menu.
Click the "+ Create" button located in the top-right corner of the screen.
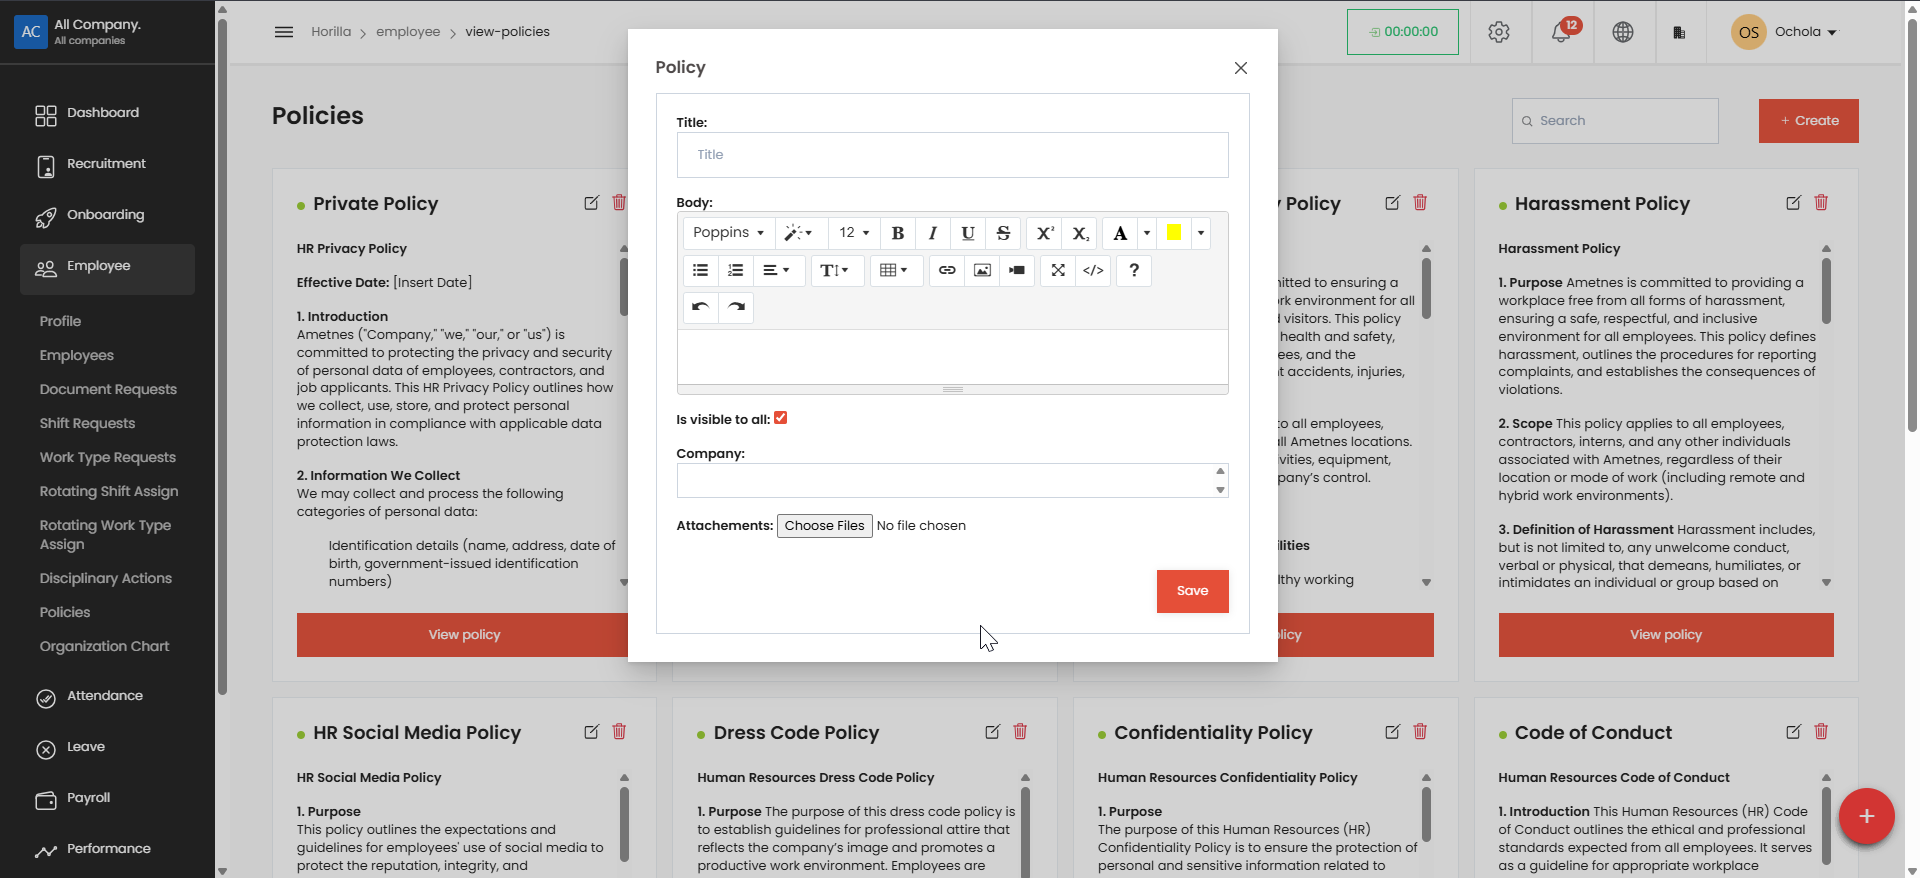
In the "Policy" modal window that appears, complete the following fields:
Title: Enter a descriptive name for the policy in the title field
Body: Use the rich text editor to compose the policy content
Format text using the available toolbar options (bold, italic, underline, etc.)
Use heading styles, bullet points, or numbered lists for better organization
Add links or images if needed
Set visibility settings:#
Check "Is visible to all" if the policy should be accessible to all employees
If not checked, you'll likely need to specify which groups can view it
Select the appropriate Company from the dropdown menu if you manage multiple companies.
Optional: Add supporting documentation by clicking the "Choose Files" button in the Attachments section.
Review all information for accuracy and completeness.
Click the "Save" button to submit and publish the policy.
Once saved, the new policy will appear in the Policies table alongside other existing policies like Private Policy.
Organization Chart#
Visual representation of the company’s hierarchical structure.
Employees can view reporting relationships, departmental structures, and key personnel.
Helps new employees understand the company workflow and leadership structure.