Leave Management#
The Leave Management Module provides an intuitive view for managing leave-related tasks. Below is a breakdown of the available menu items and their functions.
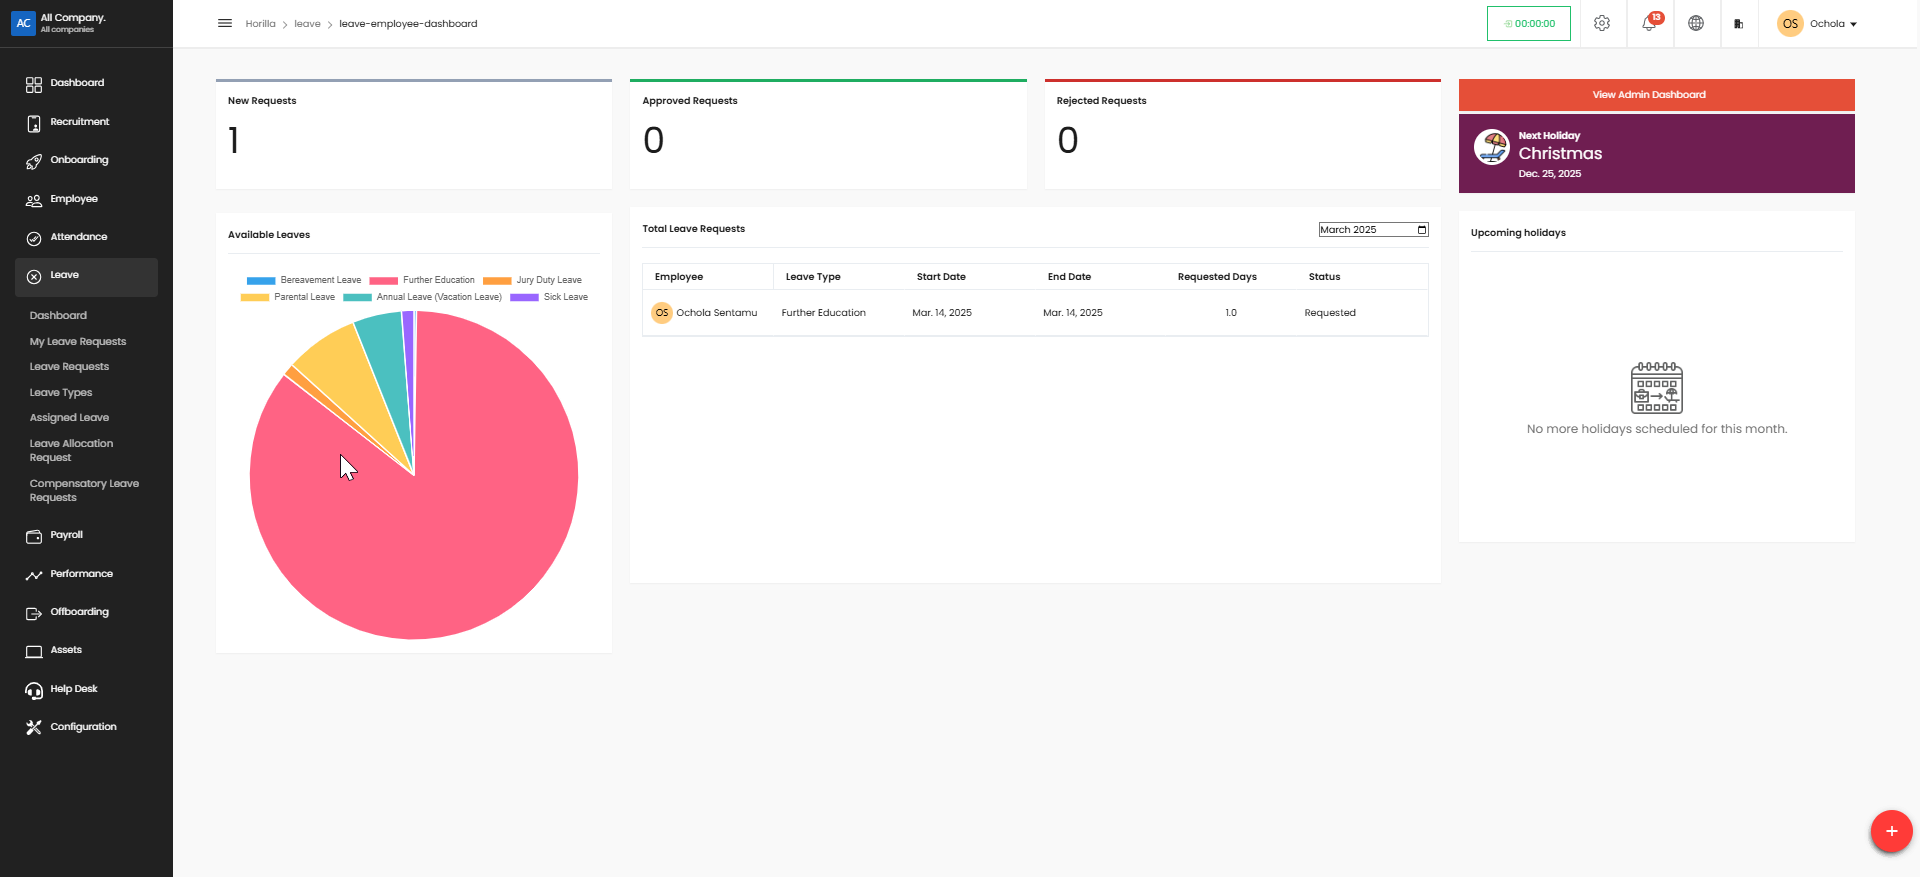
Dashboard#
Overview of the leave system, including leave balances, recent leave requests, and pending approvals.
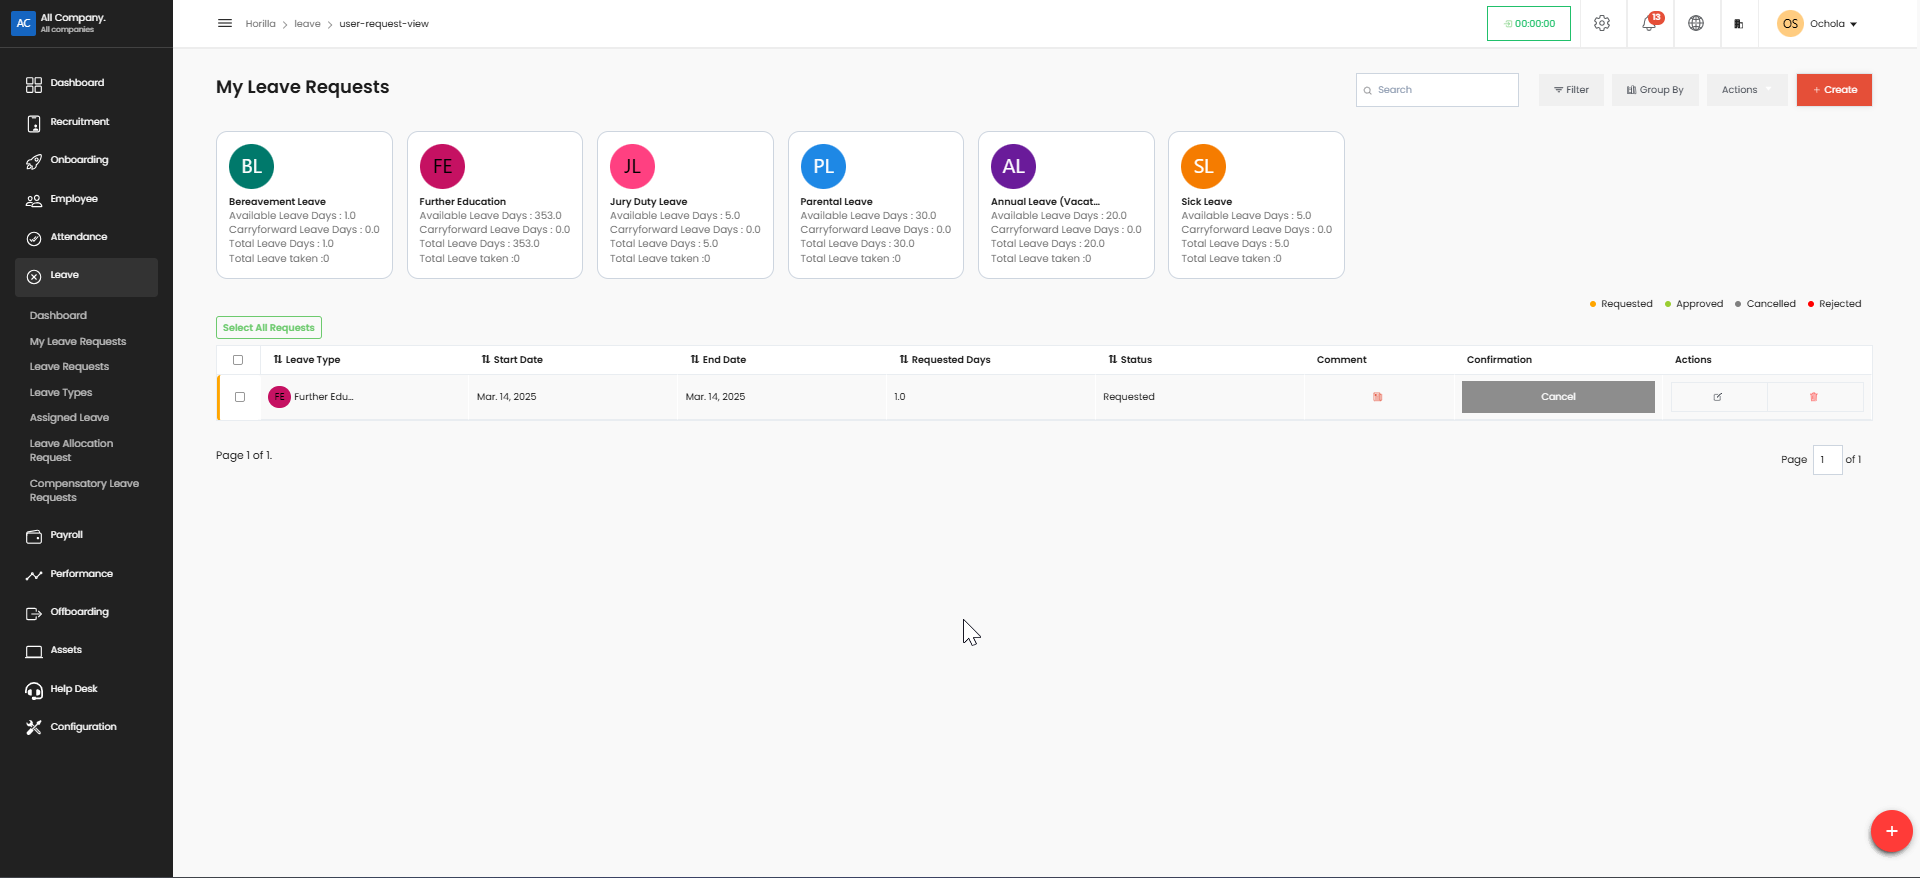
My Leave Requests#
This option allows you to manage your leave requests
Check the status of submitted requests.
How to Submit a New Leave Request#
From the My Leave Requests page, click the red "Create" button in the top-right corner.
In the Create Leave Request form that appears:
Select the appropriate Leave Type from the dropdown menu
Enter the Start Date (required)
Select Start Date Breakdown (Full Day/Half Day)
Enter the End Date (required)
Select End Date Breakdown (Full Day/Half Day)
Upload any supporting documents if needed (optional)
Provide a detailed description for your leave request (required)

Click the "Save" button to submit your request
Your request will appear in the requests table with "Requested" status
Edit or cancel pending requests if necessary.
Leave Requests#
View all leave requests within the system.
Access the Leave Section
Click on the Leave option in the left sidebar menu
You will see the Leave Requests page
Create a Leave Request#
Click the red Create button in the top-right corner of the screen
A Leave Request form will appear
Complete the Request Form
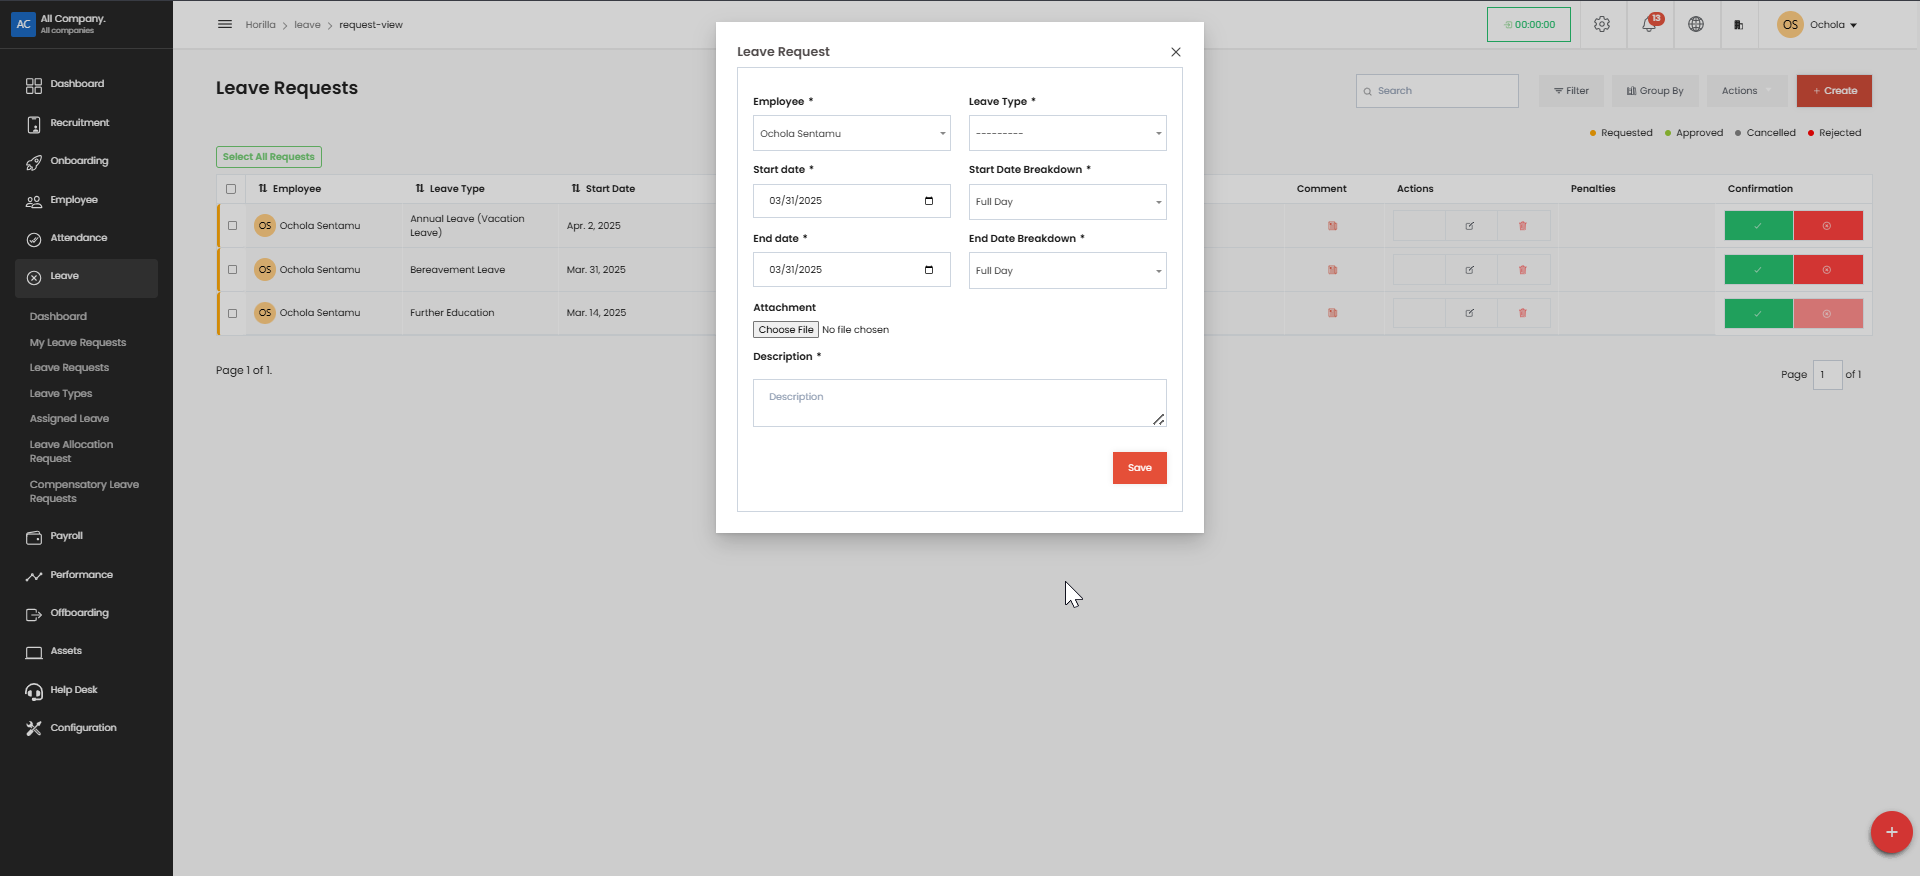
Employee: Select your name from the dropdown (if not already populated)
Leave Type: Select the appropriate leave category (Bereavement, Further Education, etc.)
Start Date: Enter the first day of your leave using the date picker (format: MM/DD/YYYY)
Start Date Breakdown: Specify if it's a Full Day or Half Day
End Date: Enter the last day of your leave using the date picker
End Date Breakdown: Specify if it's a Full Day or Half Day
Attachment: Upload any supporting documents if required (click "Choose File")
Description: Provide details about your leave request (reason, plans for work coverage, etc.)
Review all information for accuracy
Click the "Save" button in the bottom-right corner of the form
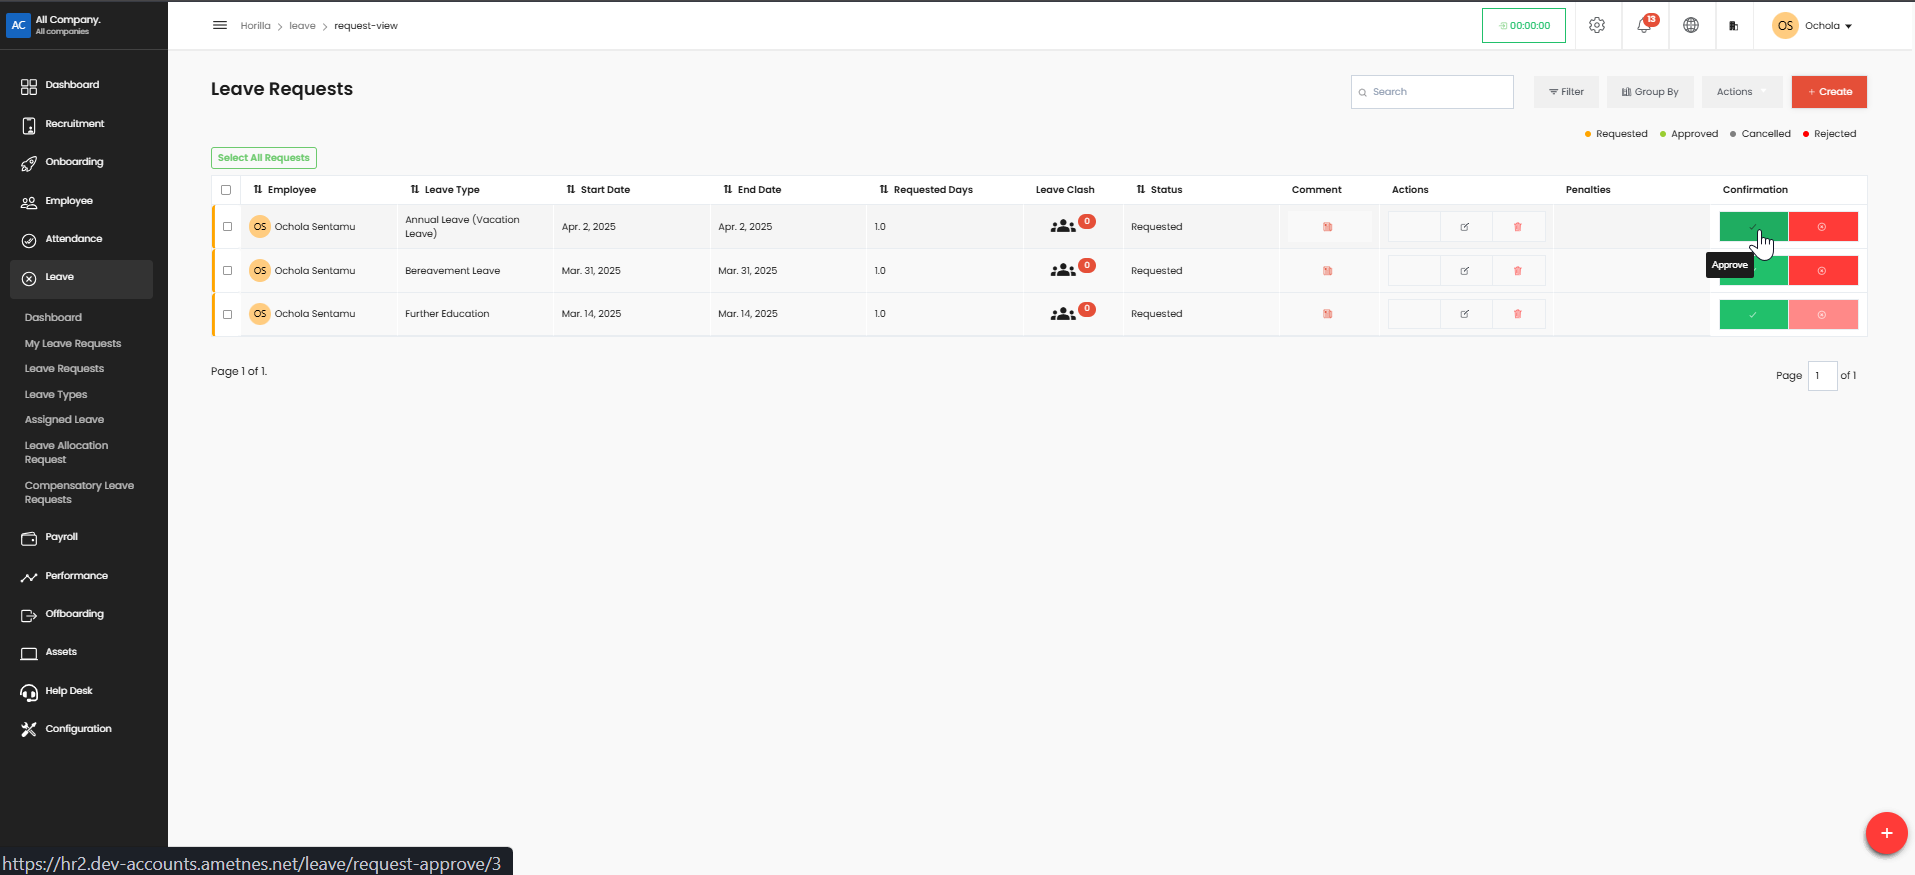
Your request will appear in the leave requests table with "Requested" status
Your submitted request will be visible in the main "Leave Requests" table
You can monitor its status (Requested, Approved, Cancelled, or Rejected)
Green confirmation indicators show approved requests
Red indicators show rejected requests
Leave Types#
Define and categorize different leave types (e.g., annual leave, sick leave, maternity leave).
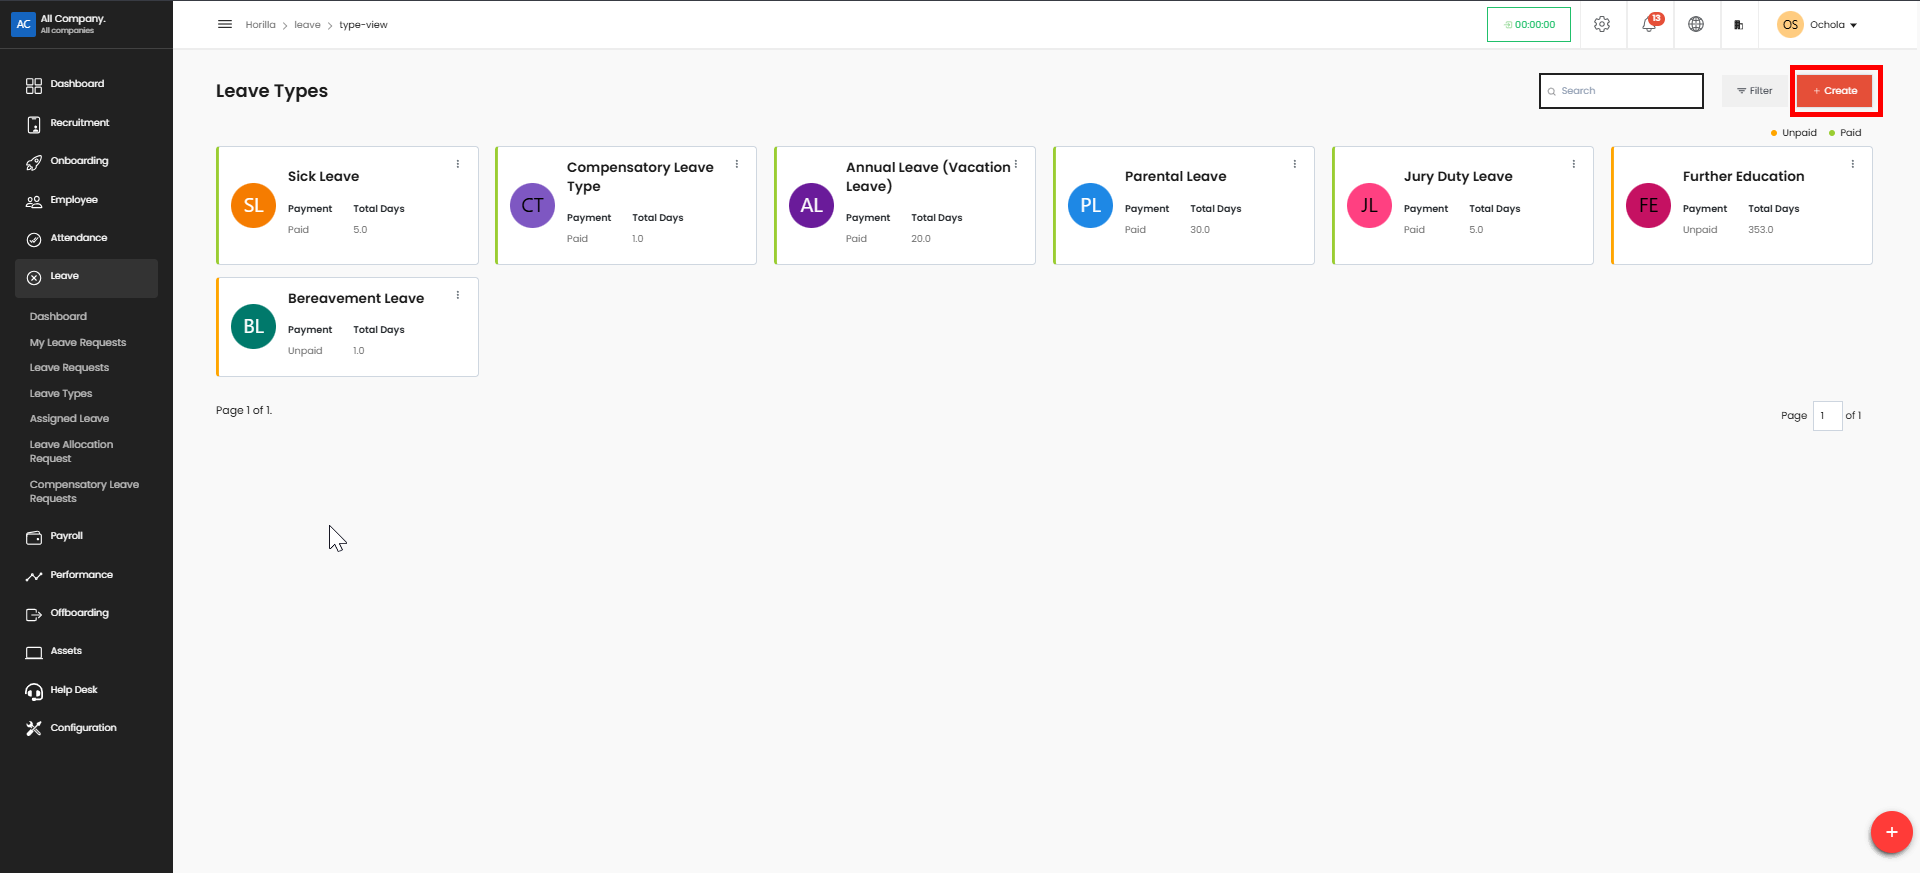
Click on the "Leave" option in the left sidebar menu.
Navigate to the leave type creation page
Enter a descriptive name for the new leave type in the "Name" field (e.g., "Parental Leave", "Study Leave").
Upload an icon by clicking the "Choose File" button in the Icon section. This will help visually identify the leave type.
Select a color for the leave type using the color picker. This color will be used in the system's visual displays.
In the "Is Paid" dropdown, select whether this leave type will be paid or unpaid.
If you want to limit the number of days employees can take for this leave type:
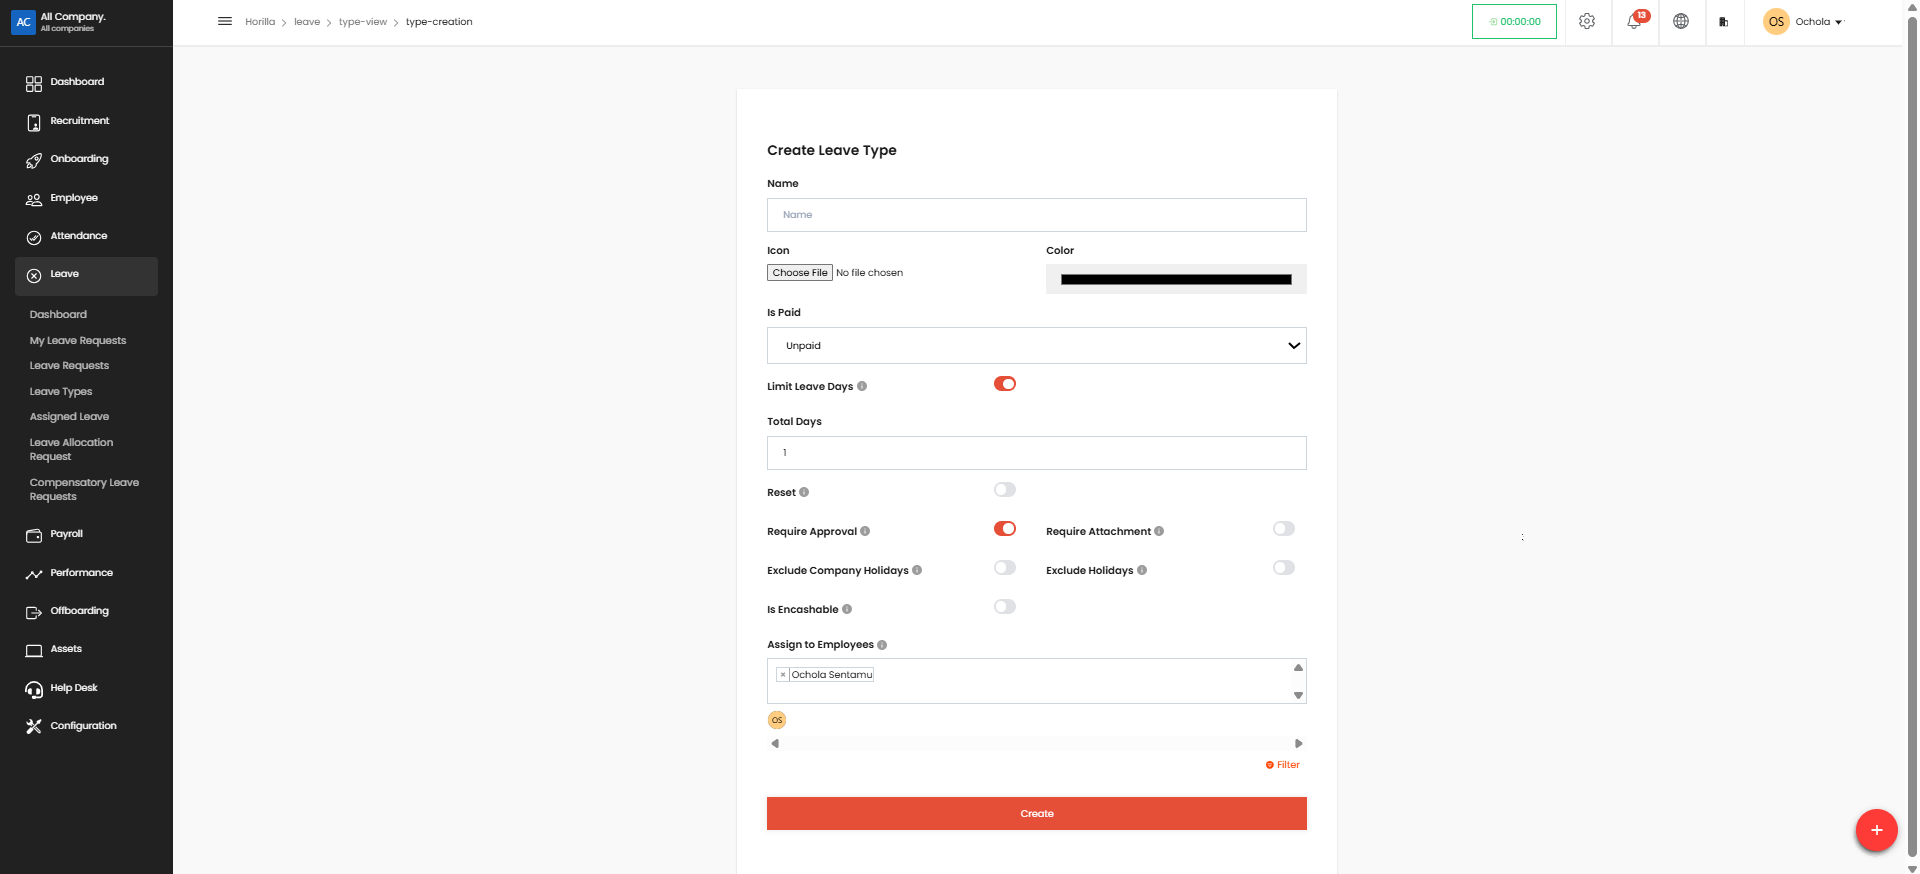
Toggle the "Limit Leave Days" switch to ON (red)
Enter the maximum number of days allowed in the "Total Days" field
Set additional configuration options as needed:
Toggle "Reset" ON if the leave balance should reset periodically
Toggle "Require Approval" ON if manager approval is required
Toggle "Require Attachment" ON if supporting documentation is required
Toggle "Exclude Company Holidays" ON if company holidays shouldn't count as leave days
Toggle "Exclude Holidays" ON if public holidays shouldn't count as leave days
Toggle "Is Encashable" ON if unused leave can be converted to cash
Assign the leave type to specific employees by selecting names in the "Assign to Employees" field. You can select multiple employees.
Review all settings to ensure they're correct.
Click the red "Create" button at the bottom of the form to save the new leave type.
The new leave type will now be available for employees to select when requesting leave.
Assigned Leave#
Click "Leave" in the left sidebar menu.
Select "Assigned Leave" from the submenu options.
The "All Assigned Leaves" page displays different leave types in collapsible sections.
Click the arrow icon next to any leave type (e.g., Sick Leave) to expand and view employees assigned to that leave type.
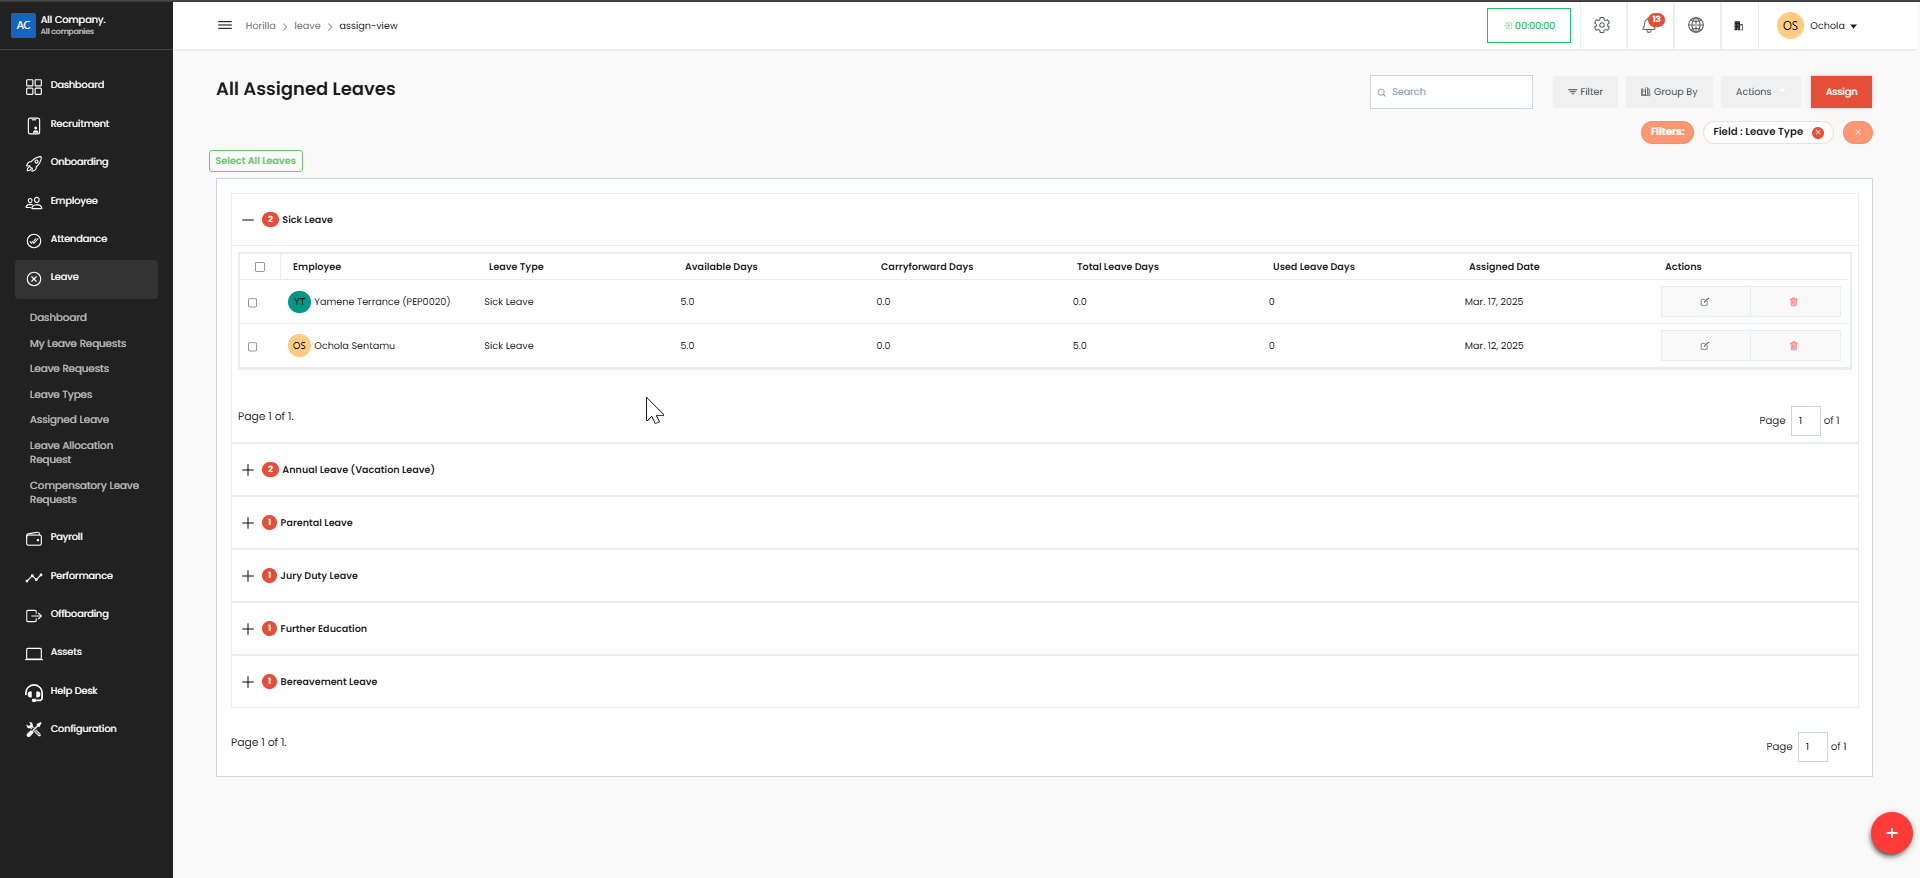
For each employee, you can see: Employee name
Leave type
Available days
Carryforward days
Total leave days
Used leave days
Assignment date
Use the search box in the top-right to find specific employees.
Filter results by clicking the "Filter" button or use the specific "Field: Leave Type" filter.
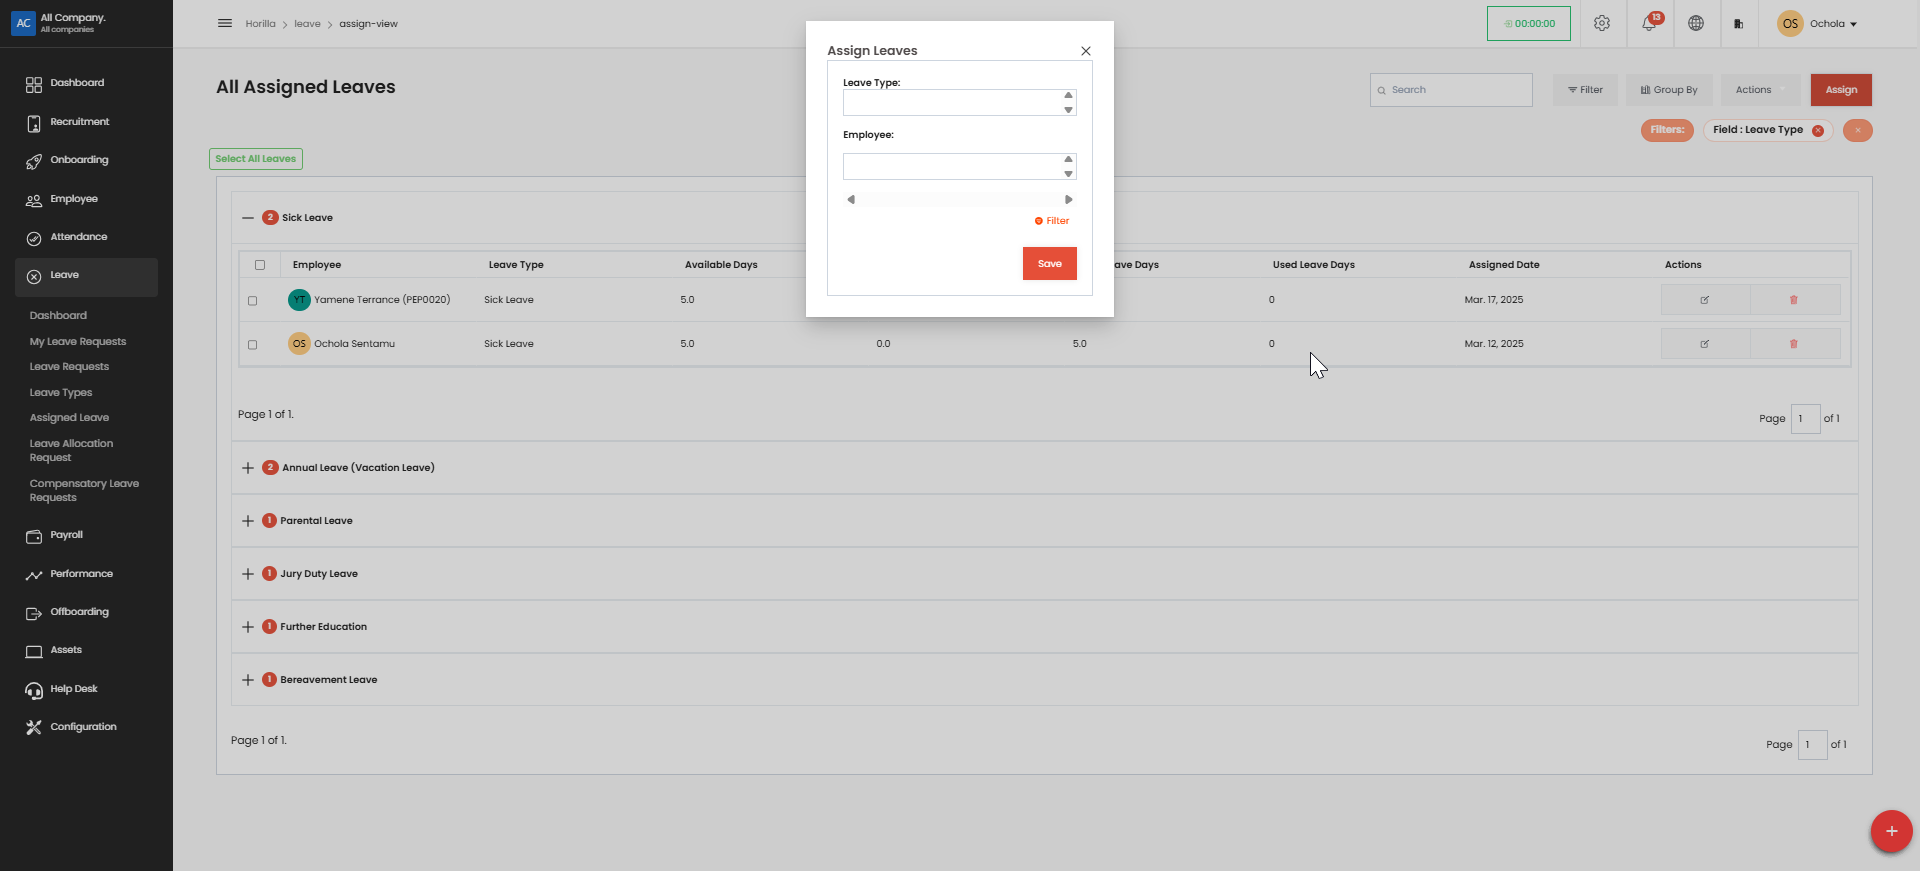
To assign new leaves, click the red "Assign" button in the top-right corner.
Use the action icons in the rightmost column to edit or delete assignments.
Click "Select All Leaves" to perform bulk actions on multiple assignments.
Navigate between pages using the pagination controls at the bottom of the table.
Leave Allocation Request#
Request additional leave allocations.
Approve or reject leave allocation requests (for authorized users).
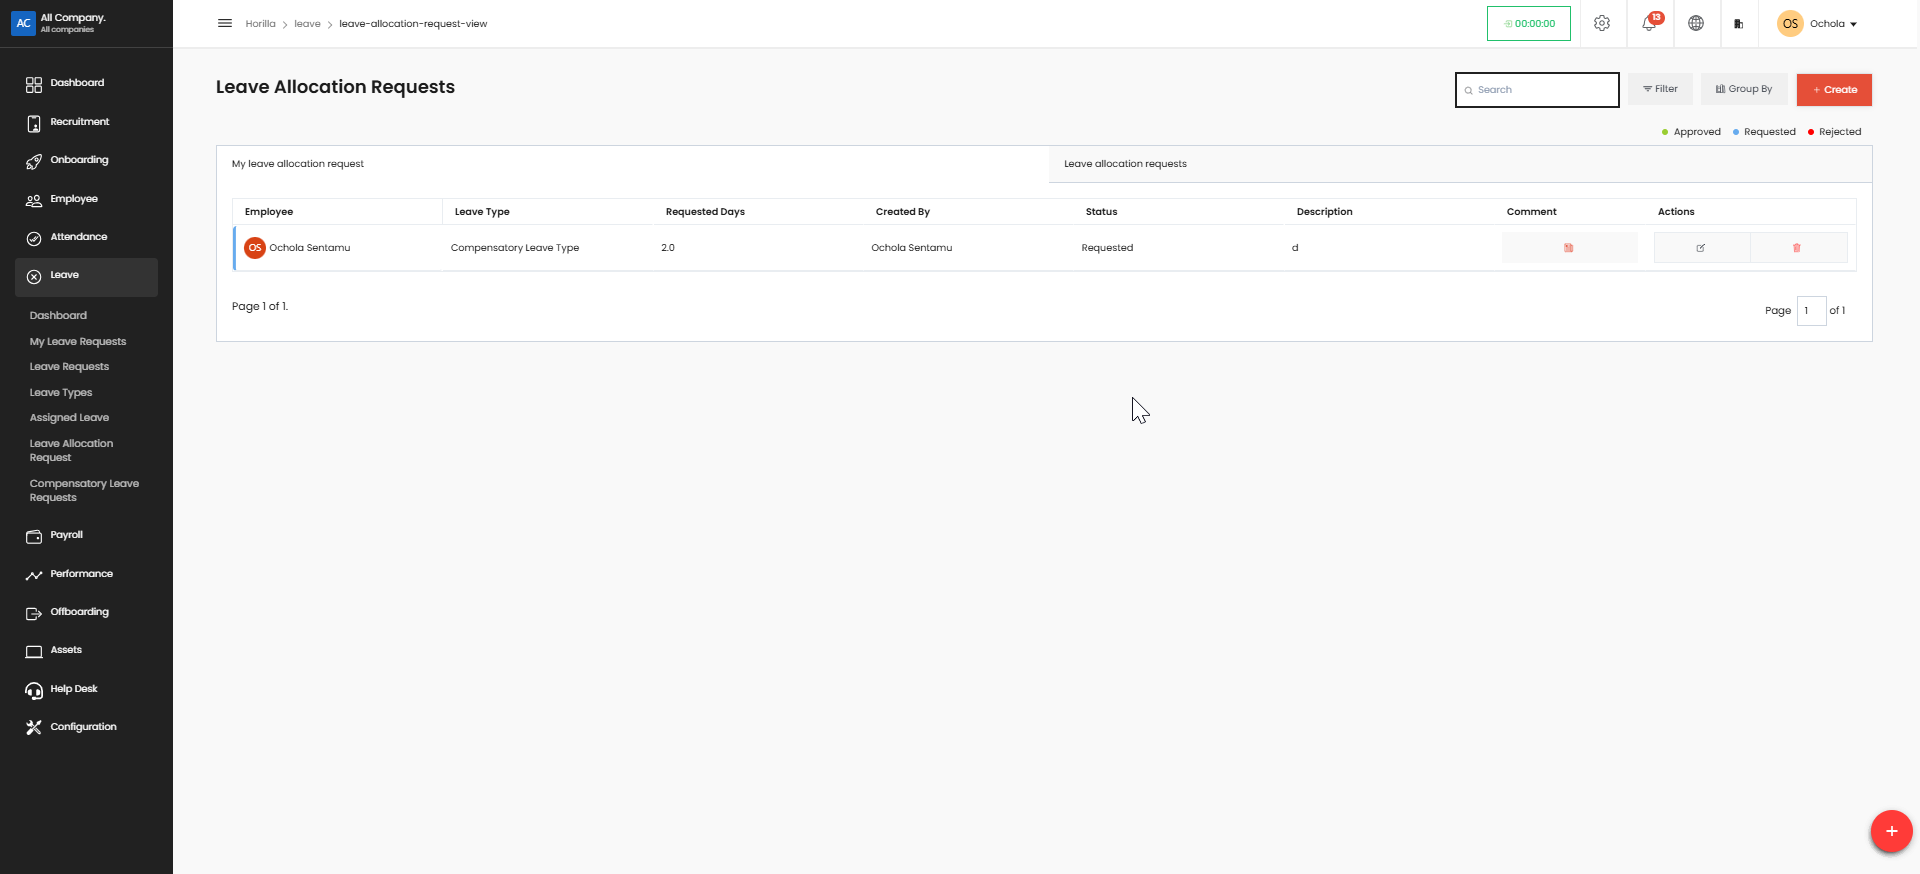
Click "Leave" in the left sidebar
Navigate to "Leave Allocation Request"
Click the red "Create" button in the top-right corner
Fill in the form:
Select Leave Type from dropdown
Choose Employee name (or verify if pre-selected)
Enter number of Requested days
Write a brief Description explaining the allocation
Attach supporting documents if needed

Click "Save" to submit the request
Your request will appear in the table with status indicators (Approved, Requested, or Rejected)